

Supported models:
Apple Watches series 0 to 5 and SE 1st and 2nd generation
All-in-one Apple Watch reader
-
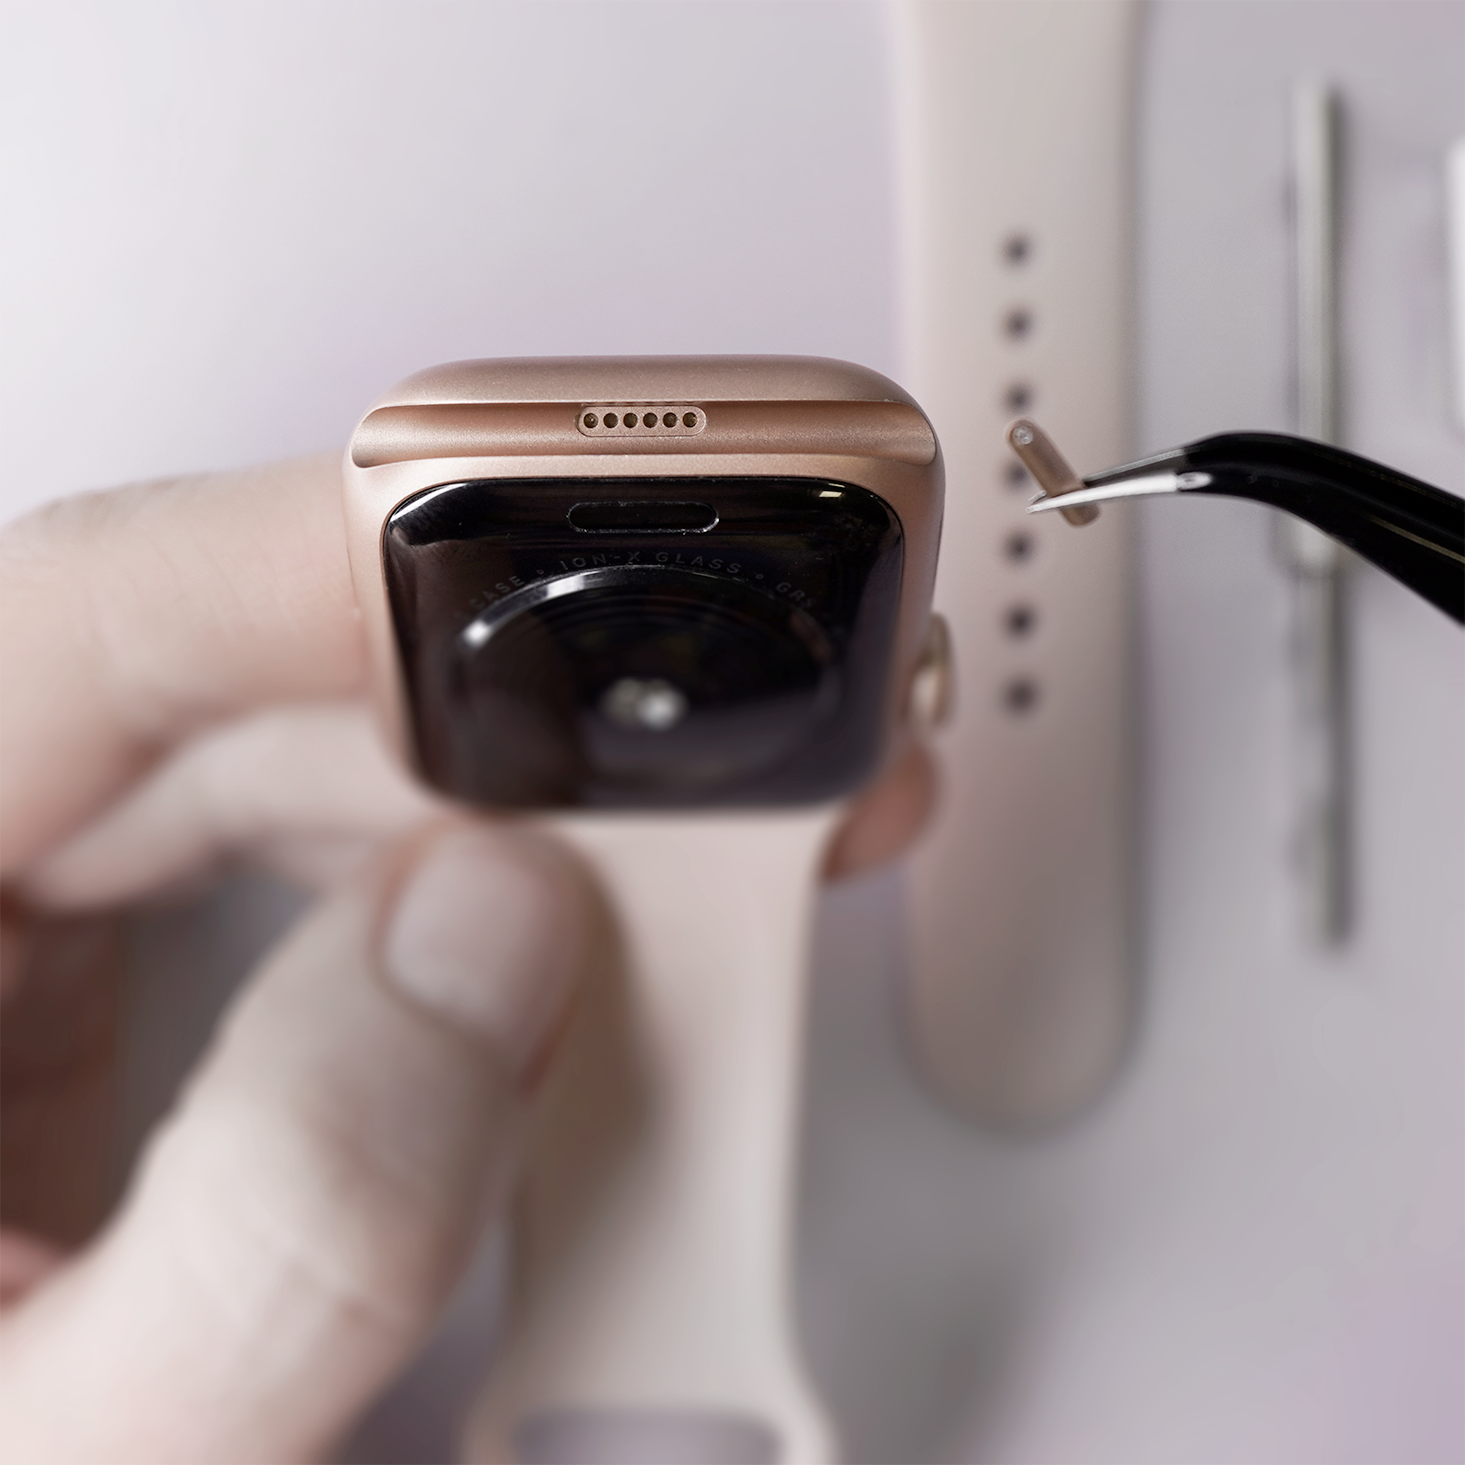
To access the diagnostic port of your Apple Watch, first remove the watch strap. This will reveal the diagnostic port located at the bottom of the watch. Use a needle or a pair of tweezers to gently insert into the diagnostic hole. Apply careful pressure to remove the small cover concealing the port.
-
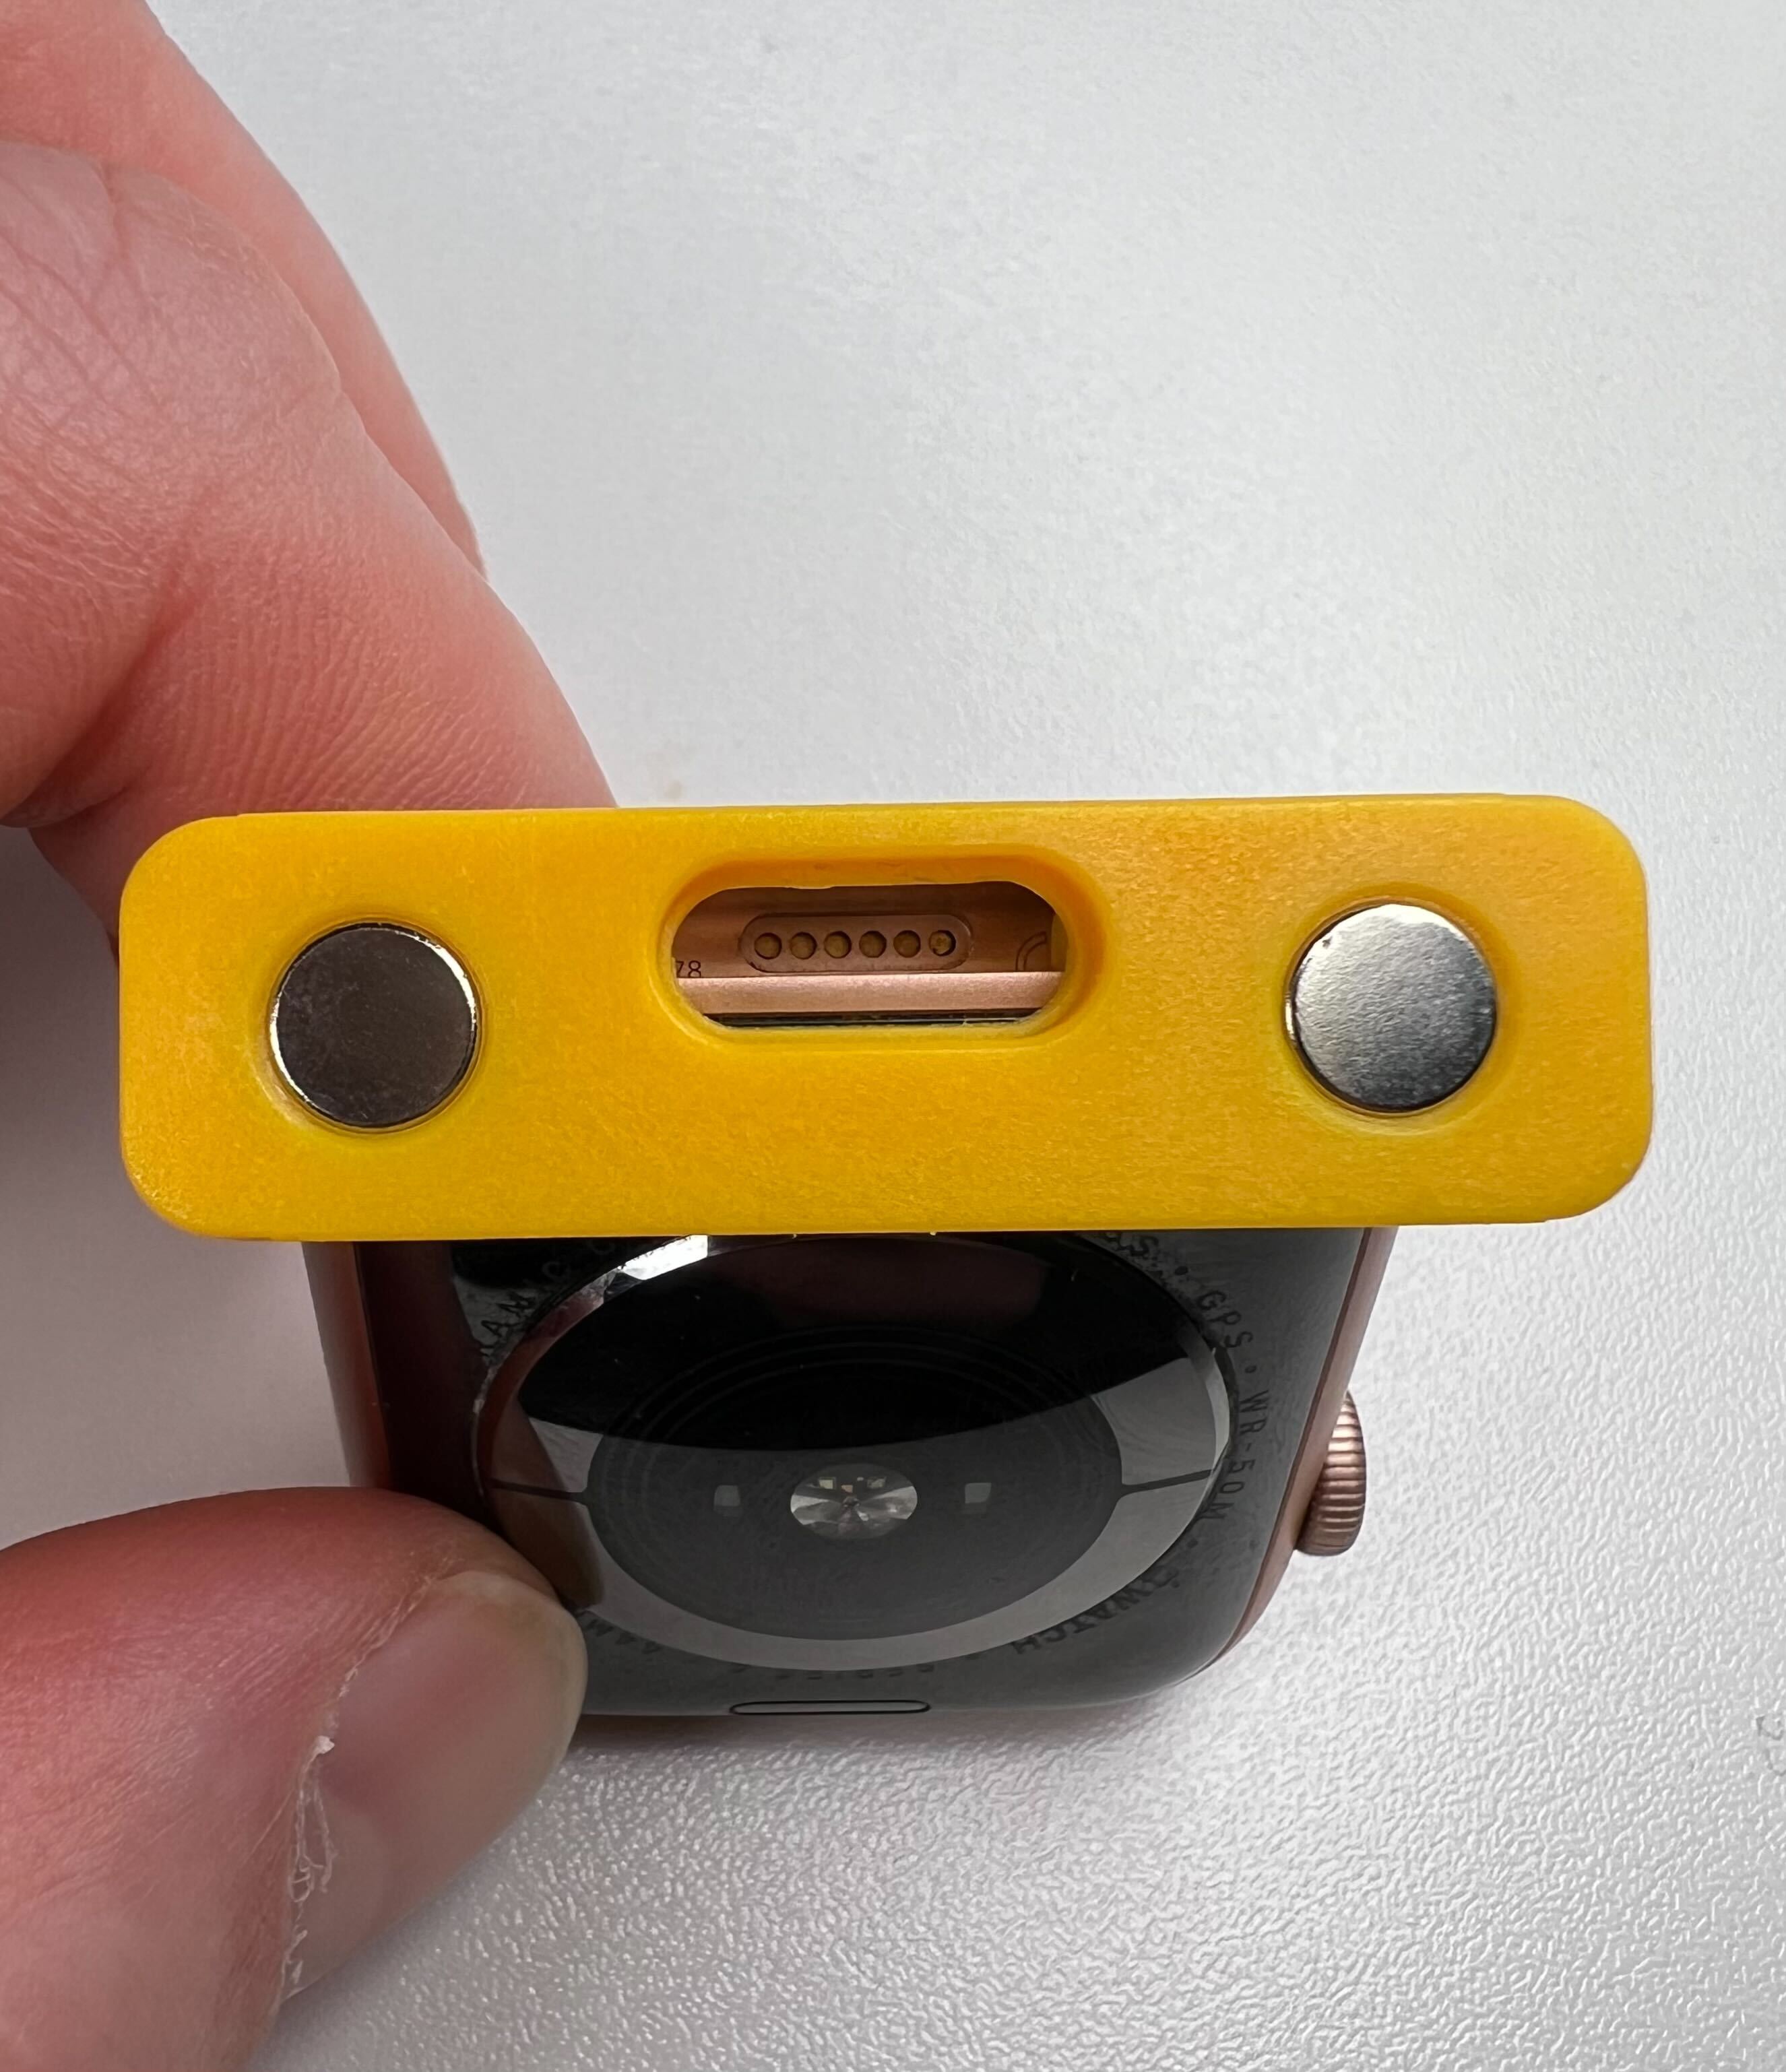
Next, select the appropriate adapter for your watch model. There are four distinct adapters, each marked with the corresponding model and dimension specifications on their top surface.
.jpg?cb=f9526fd2304679c23532ff91ad98dbcc)
-
Insert the chosen adapter into the strap channel of your Apple Watch.
-
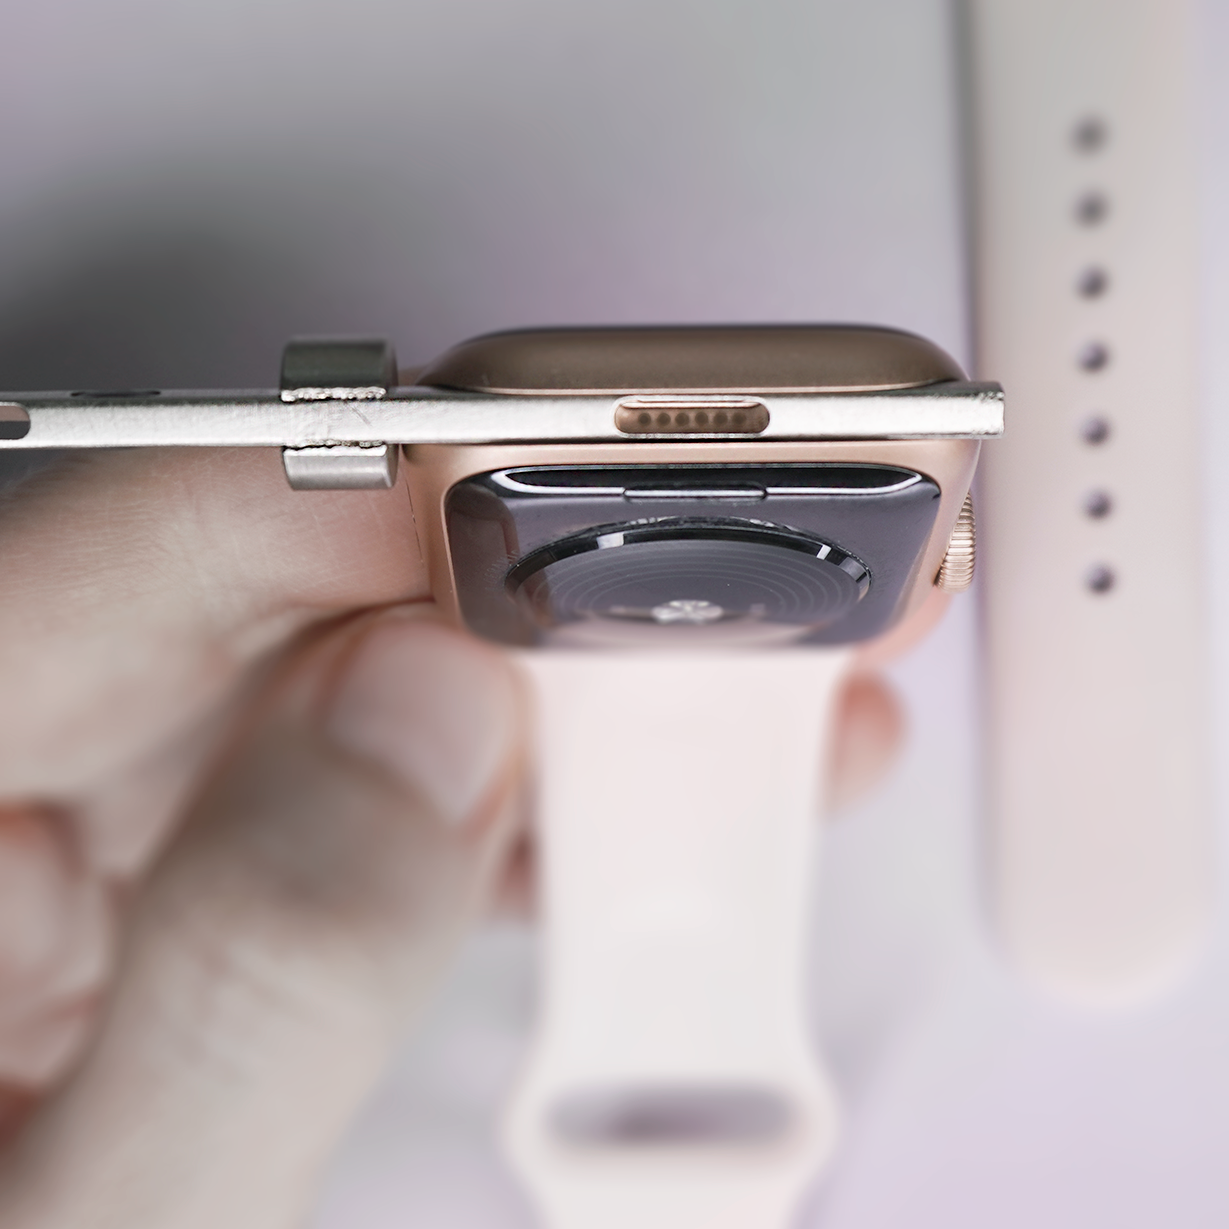
Finally, attach the watch with the fitted adapter to the designated position on the diagnostic reader. The adapter has built-in magnets that ensure the watch is firmly and safely held in position.
.jpg?cb=158fd45df0d1b85af0f8e6de6df2c8ce)
After successfully connecting the watch to your computer, you should be prompted to enter a passcode to confirm the trust message.
At this point, you should proceed with the extraction as you would with any other device.
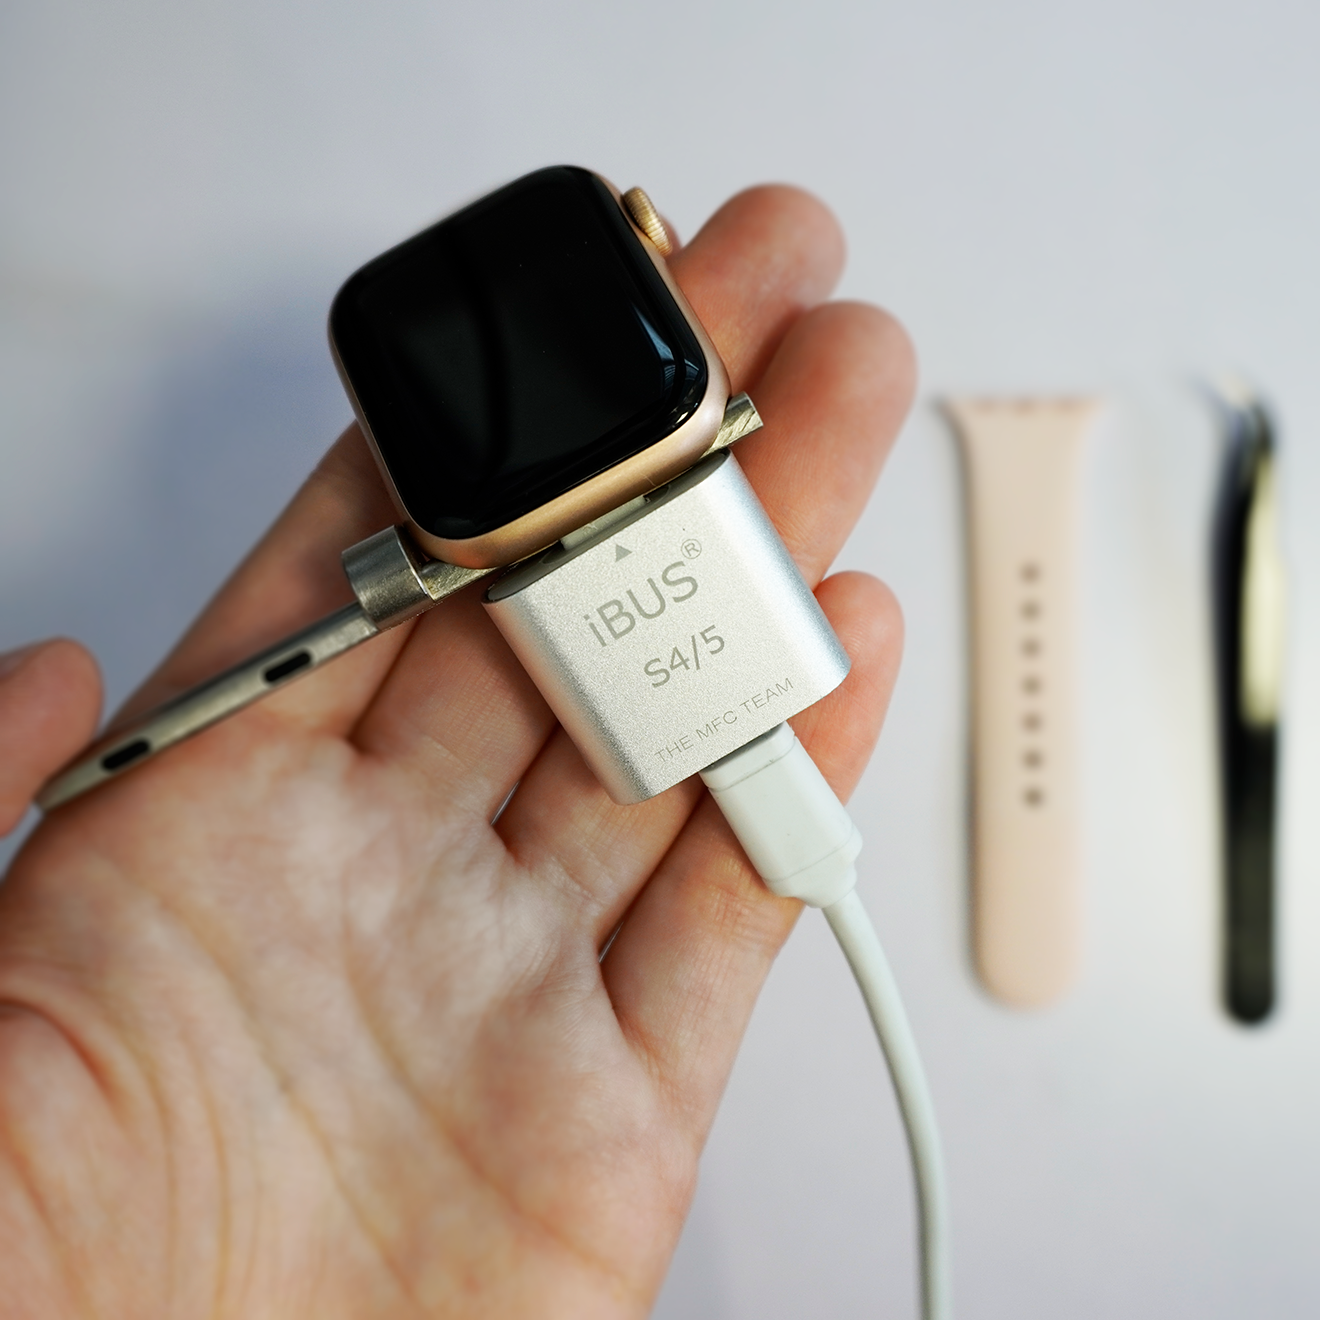
iBus Apple Watch readers
For Apple watches series 0 and 1 an iBUS S1 connector is needed.
For Apple watches series 2 and 3 an iBUS S2 connector is needed.
For Apple watches series 4, 5 and SE an iBUS S4/S5 connector is needed.
-
You will find the Apple Watch diagnostic port on the bottom of the watch after removing the strap. Place a needle or tweezers in the diagnostic hole and carefully remove the small cover.
-
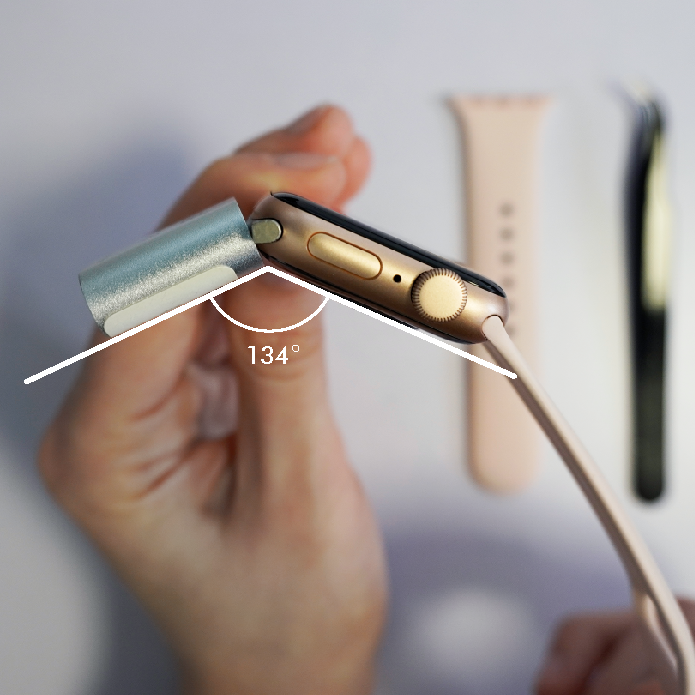
Insert the iBUS adapter extension into the strap channel. The extension has a choice of two length options, you need to take into account the model and size of the watch you are working with.
-
Then, very carefully, connect the iBUS adapter to the watch diagnostic port by inserting it through the adapter. The connected adapter should sit at an angle of approximately 134 degrees to the watch.
-
Connect the USB lightning cable to the iBUS adapter and the USB-A connector to your workstation..
After successfully assembling the iBUS reader and connecting the watch to your computer, you should be prompted to enter a passcode to confirm the trust message.
At this point, you should proceed with the extraction as you would with any other device.
Video - How to connect iWatch to MOBILedit Forensic using iBus readers
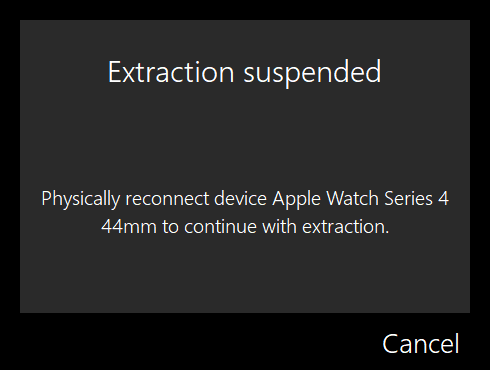
If you see this pop up, physically disconnect and reconnect the USB cable and the extraction will continue from where it left off.