Data - System logs

Android
System logs and "DumpSys" files can be extracted from Android phones. Android system keeps these files for debugging and monitoring purposes and the files can contain various system data like recent locations, recently connected Wi-Fi networks, recently launched and running applications, recent cell locations and signal info, current Bluetooth MAC address and name, etc.
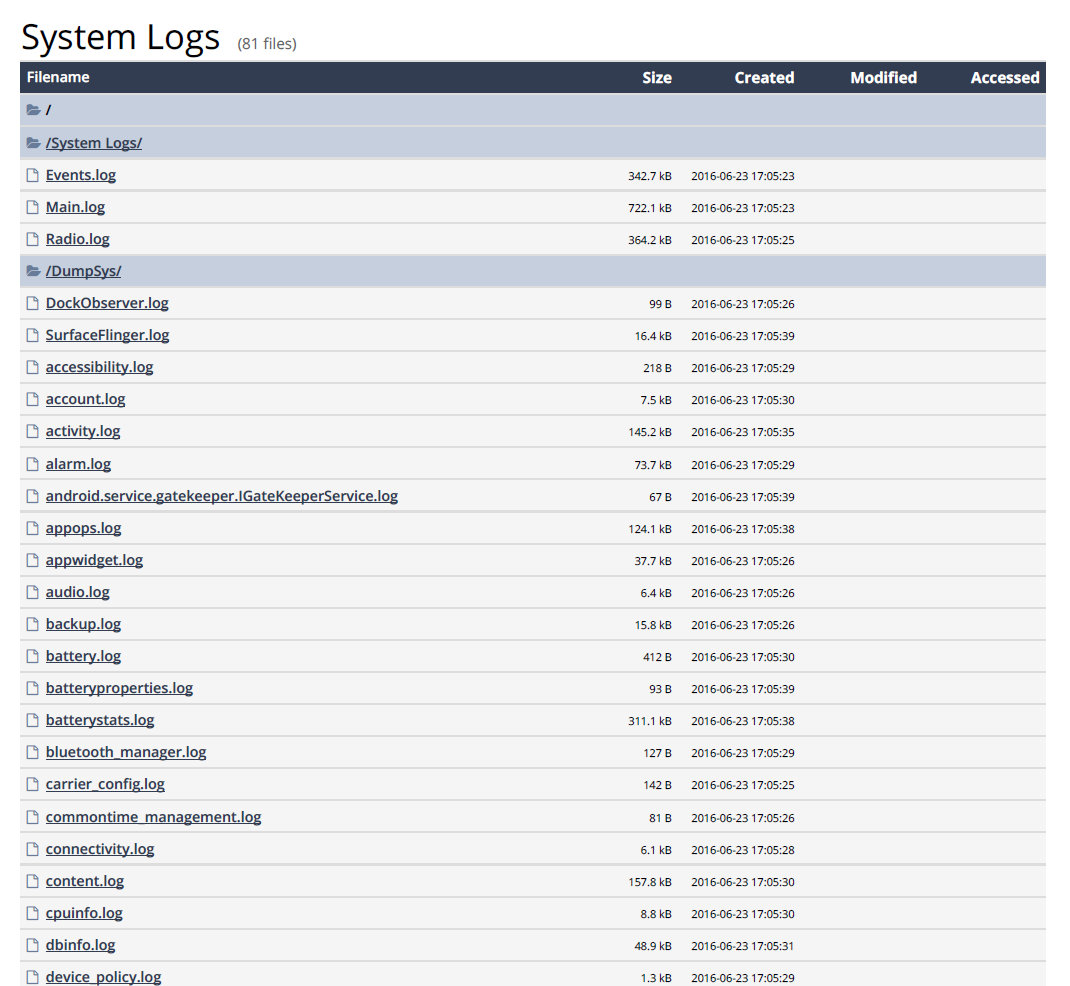
These files are listed in the System Logs section within the HTML and PDF reports and can be directly opened by clicking on their filenames. Their content is also used for the analysis of Wi-Fi networks, Locations, and Notifications.
It is also possible to analyse device HW usage from the “DumpSys” logs, such as battery, flashlight, camera, screen, Wi-Fi, Bluetooth, or GPS.
Some logs can be acquired through developer options and ADB, others may be obtained with the addition of root access.
Example of System logs report (Android)

iOS / iPadOS
On iOS / iPadOS devices many different log types can be analysed providing information of:
Device unlocking events
Interaction with users of other devices
More geolocations
Network usage, including Wi-Fi and pairing activity
Geolocation Map Tiles
Autocomplete data
Some data is extracted with a non-jailbroken iPhone, although significantly more data can be obtained with a jailbroken device.
Sysdiagnose
Sysdiagnose is one such log and serves a similar purpose as diagnostic logs on other platforms. These logs are manually generated on an iOS device and can be extracted and analyzed for troubleshooting.
The sysdiagnose logs can be extracted from a live-connected jailbroken device or you can import sysdiagnose logs for analysis.
Follow these steps to create the sysdiagnose logs on a device:
1. Generate Sysdiagnose Logs:
a. using buttons on your phone:
Simultaneously press the Volume Up, Volume Down, and Power buttons.
Hold these buttons for approximately 1.5 seconds.
b. using AssistiveTouch > Analytics:
On iOS 5 or higher, you can create sysdiagnose logs via AssistiveTouch:
iOS versions 12 and below:
navigate to Settings > General > Accessibility > AssistiveTouch:
AssistiveTouch: ON
Customize Top Level Menu…
Select [+] > select “Analytics”
Use the activated AssistiveTouch button > select “Analytics”
The sysdiagnose protocol is preparing when the message "Gathering analysis" is displayed.
iOS / iPadOS versions 13 and above:
navigate to Settings > Accessibility > Touch > AssistiveTouch:
AssistiveTouch: ON
Customize Top Level Menu…
Select [+] > select “Analytics”
Use the activated AssistiveTouch button > select “Analytics”
The sysdiagnose protocol is preparing when the message "Gathering analysis" is displayed.
2. Wait for Sysdiagnose Logs to complete:
If done correctly, the sysdiagnose logs will be generated.
This process may take several minutes.
When it is complete, a notification will briefly appear at the top of the device screen.
3. Verify creation of Sysdiagnose Logs:
on iOS versions 12 and below, navigate to:
Settings > Privacy > Analytics > Analytics Data
on iOS / iPadOS versions 13 and above, navigate to:
Settings > Privacy > Analytics & Improvements > Analytics Data
then look for files with names starting with "sysdiagnose" to confirm that the logs were successfully generated.
4. How to locate the Sysdiagnose Logs:
When the iOS / iPadOS device is correctly connected to MOBILedit Forensic ULTRA/PRO/Standard:
use the [Browse content] button to open the File manager:
open this directory path:
Multi root (raw4)/%APPDATAROOT%/~CrashLogs/DiagnosticLogs/sysdiagnose
Category | Sysdiagnose | Apple Unified Log |
|---|---|---|
Purpose | Snapshot of system state | Detailed timeline of events and logging |
Initiation | sudo sysdiagnose or key combination | sudo log collect --device --output /path/to/name.logarchive |
File size | 300 MB – 1 GB+ | 100 MB – several GB depending on logging duration |
Analysis tools | Forensic license tools, grep, custom scripts, etc. | Forensic license tools, log command, custom scripts, Consolation3, etc. |
Content | Bundle with log files, crash reports, sysdiagnose, network status, battery, kernel logs, etc. | Detailed, chronological logs of system and app activities, including subsystem events |
Time source | System clock (RTC) at snapshot moment | System clock and monotonic time |
Timestamps | YYYY-MM-DD HH:MM:SS +0000 | YYYY-MM-DD HH:MM:SS.ns (nanoseconds) +0000 |
Timeline structure | Limited, fragmented | Fully chronological, nanosecond precision |
Time analysis | Limited | Excellent |
Forensic information | Configuration, app usage, power logs, network diagnostics, crash logs | User interaction, process start/stop, system state changes, authentication events, nanosecond logs |
Privacy display | May contain raw strings | Privacy labels visible |
The above table is licensed under CC BY-SA 4.0. Concept process-flow AUL/Sysdiagnose - Version 1.2 2025-05 - T. Korver.
Categories of logs shown in the report output
Title | Description | Jailbreak required Y/N |
|---|---|---|
Logs | ||
iOS Location Related Info | Compass callibration | Yes |
iOS Cadence To Stride Estimates | Walking cadence and step length | Yes |
iOS Mobile Networks | Country and network codes of connected networks | Yes |
Geolocation Map Tiles | Cached map tile labels | Yes |
Geolocation Applications | Applications using Geolocations | Yes |
Geolocation PD Place Caches | Cahed location references | Yes |
Geolocation Config Store | Settings and permissions for locations | Yes |
Title | Description | Jailbreak required Y/N |
System Logs | ||
Interactions | App network interactions | No |
Device Usage | Device hardware usage | Yes |
Application Download History | Store downloads of apps | Yes |
System Update History | System updates and last restore | Yes |
Connected Computers History | Connections and trust | Yes |
Ringtones | Ringtone files and metadata | Yes |
Cloud Photos Logs | Sync info, number of images and videos. | Yes |
Keyboard time usage | Active usage | Yes |
Emoji count by app | Number of emoji insertions | Yes |
Character count by language | Typed characters grouped by language | Yes |
Durable records | Keyboard - Characters typed | Yes |
Transient records | Additional keyboard data - Words, autocorrections, language, predictive input counts | Yes |
Lexicon settings | Language modelling | Yes |
Dynamic lexicon | Dynamic language modelling | Yes |
iOS Device Backup Info | As described | Yes |
