

Overview
Because of FFmpeg's license and legal considerations, we cannot provide the FFmpeg library with our product, but you are able to download it on your own. Please read the FFmpeg's legal page at https://ffmpeg.org/legal.html.
Installation
-
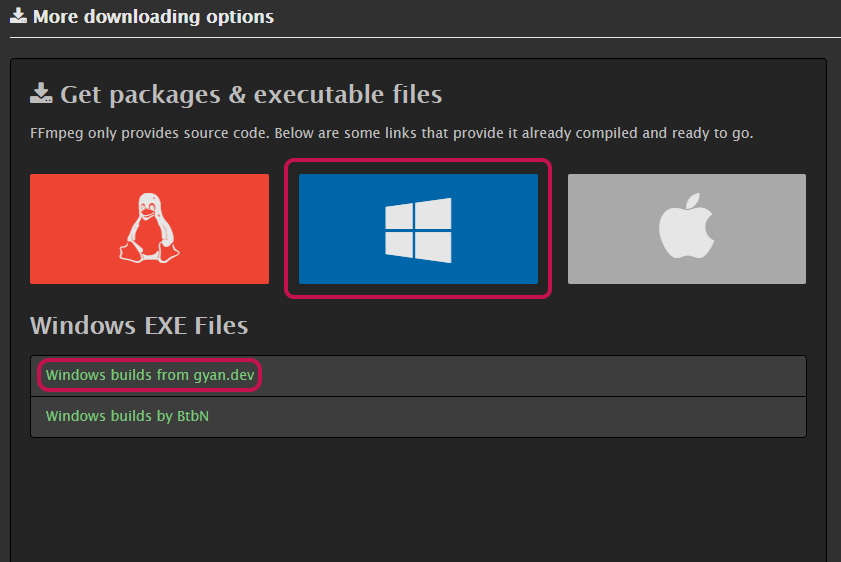
On this page, select one of the Windows EXE files (for example: “Windows builds from gyan.dev”)
-
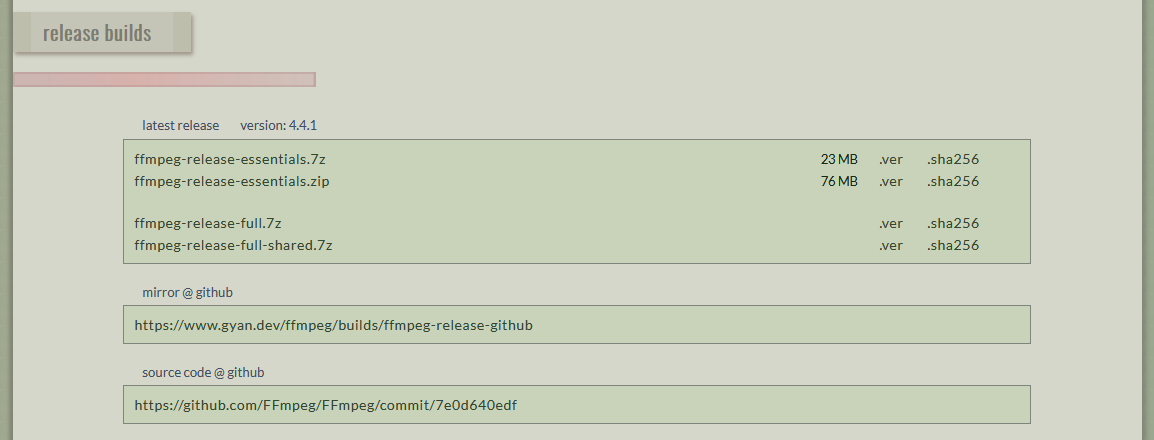
On the gyan.dev page, find a release builds section, and download the full release “ffmpeg‑release‑full.7z”:
-
Extract the FFmpeg archive (“ffmpeg-4.4.1-full_build.7z” in this case) on your computer. To do this, use a file archiver, such as 7-Zip.
-
After extracting, you should see a folder with the same name as the archive. Inside, you should see the "bin" folder with the “ffmpeg.exe” file inside. If you don't see it, the file archiver probably created a second folder with the same name as the archive.
Copy or remember the path of the "bin" folder. -
Open MOBILedit Forensic and connect the device under investigation or import backup data or a physical image of the device under investigation.
-
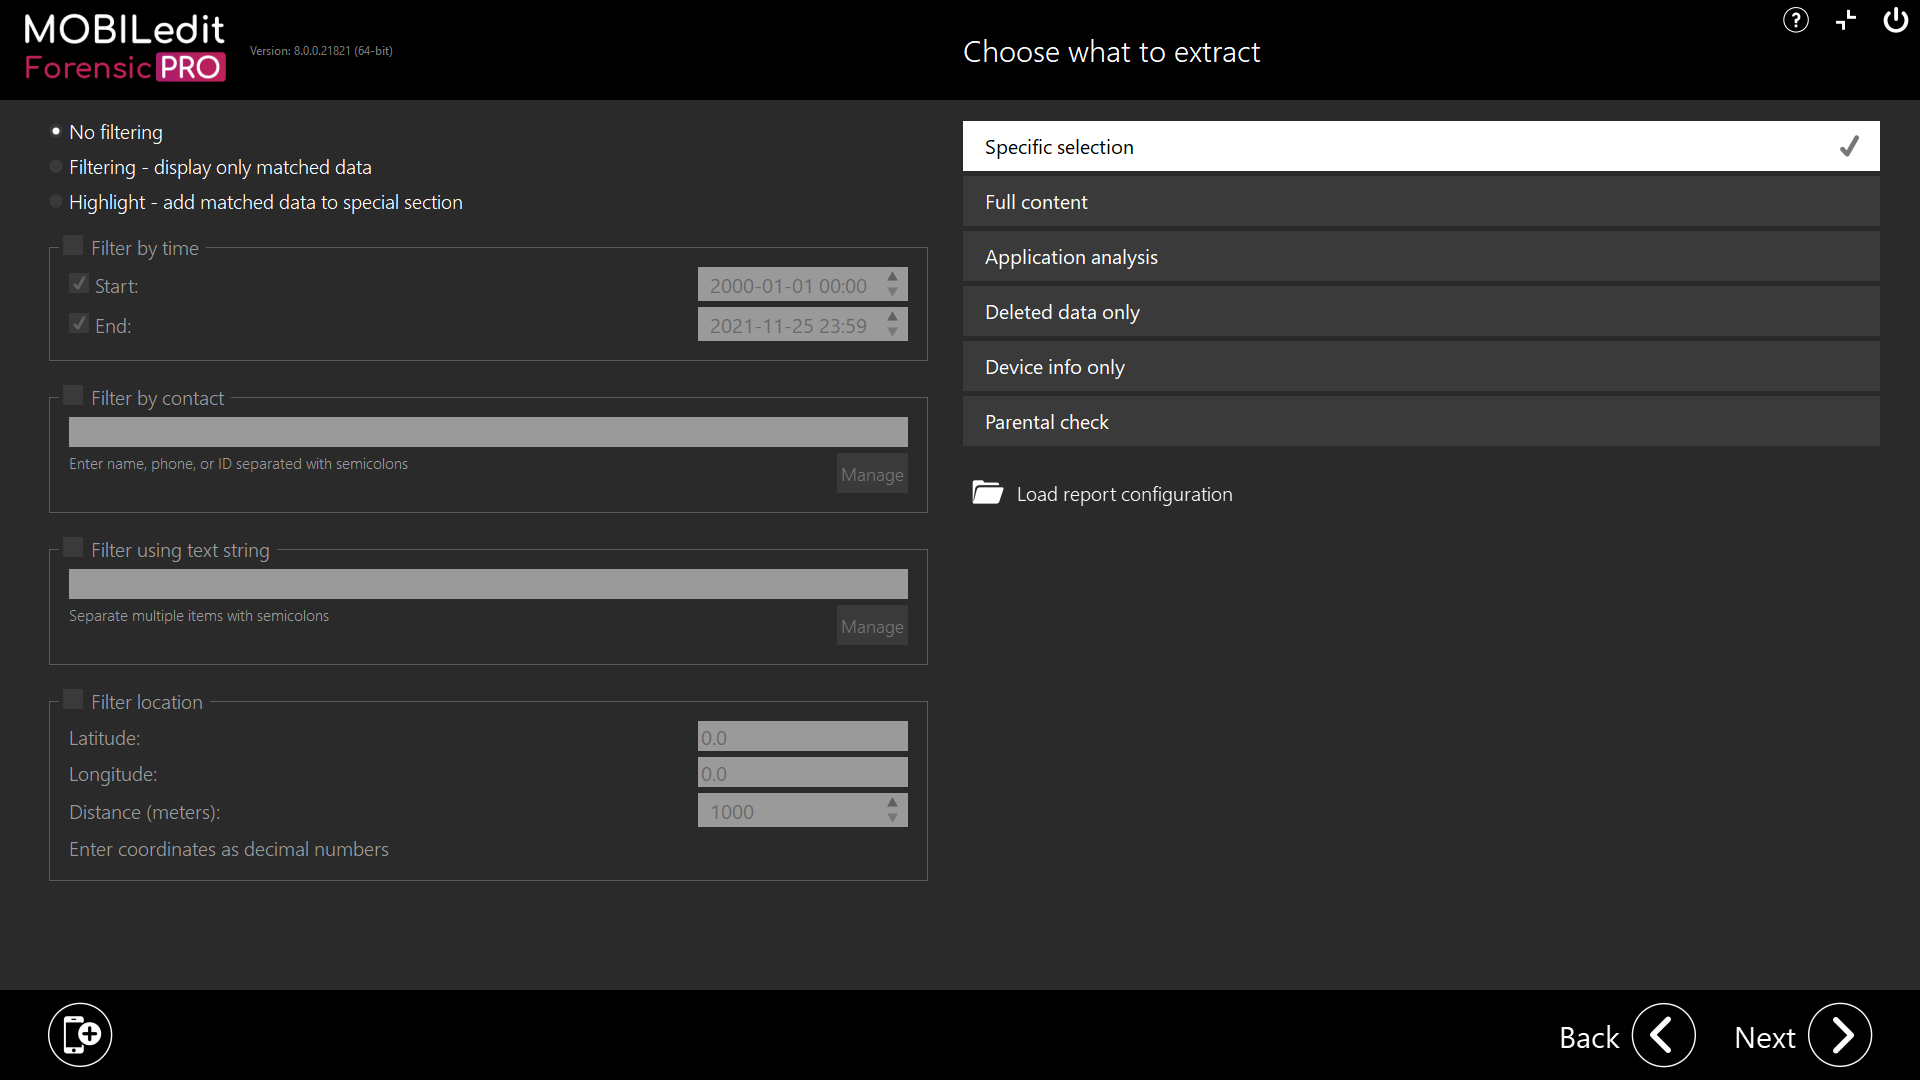
Choose action “Logical extraction” and on the “Choose what to extract” page, select the “Specific selection” and click on “Next”:
-
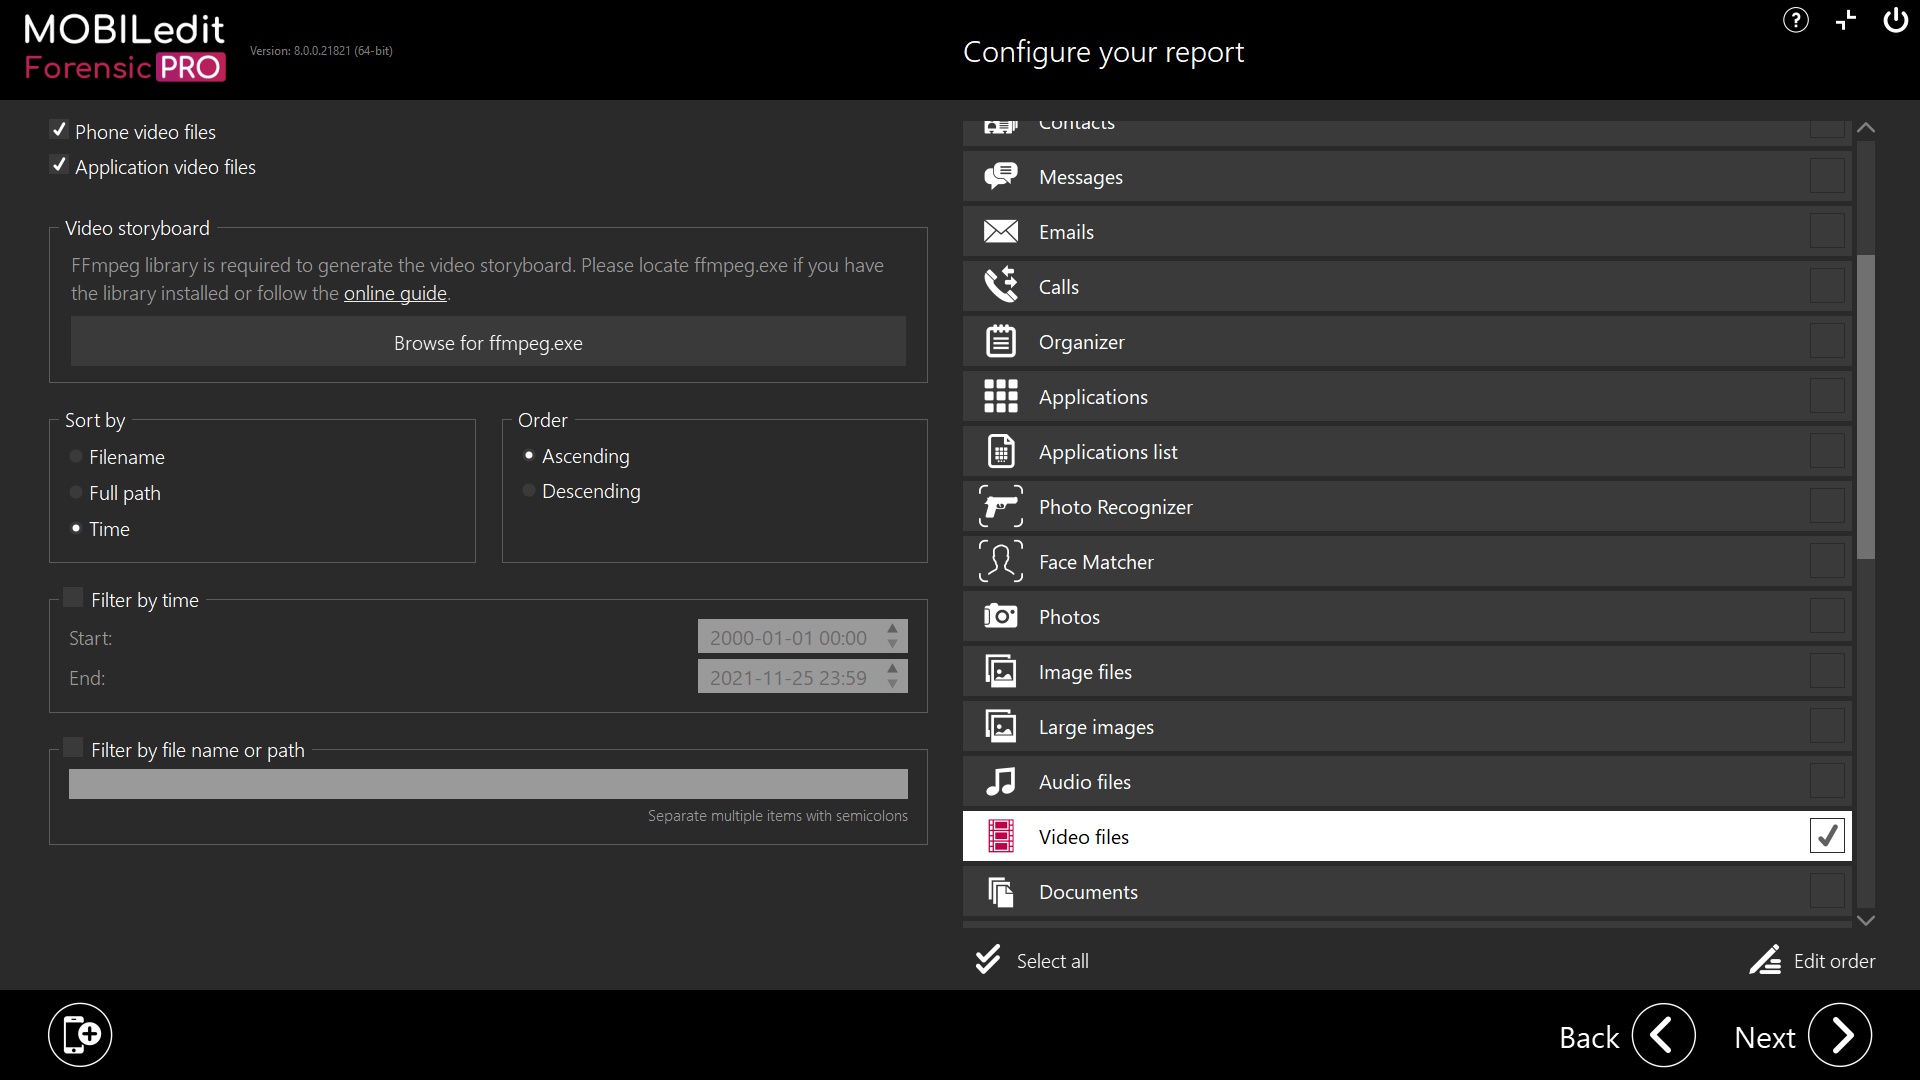
On the next page, select "Video files", then click on "Browse for ffmpeg.exe" and finally navigate to the "bin" folder path (viz previous point 5). Then select "ffmpeg.exe" file, and click on "Open":
At this stage, "ffmpeg.exe" is ready for use with MOBILedit Forensic, this step will not need to be repeated the next time you use it, as long as "ffmpeg.exe" remains unchanged in the same folder.
Storyboard settings
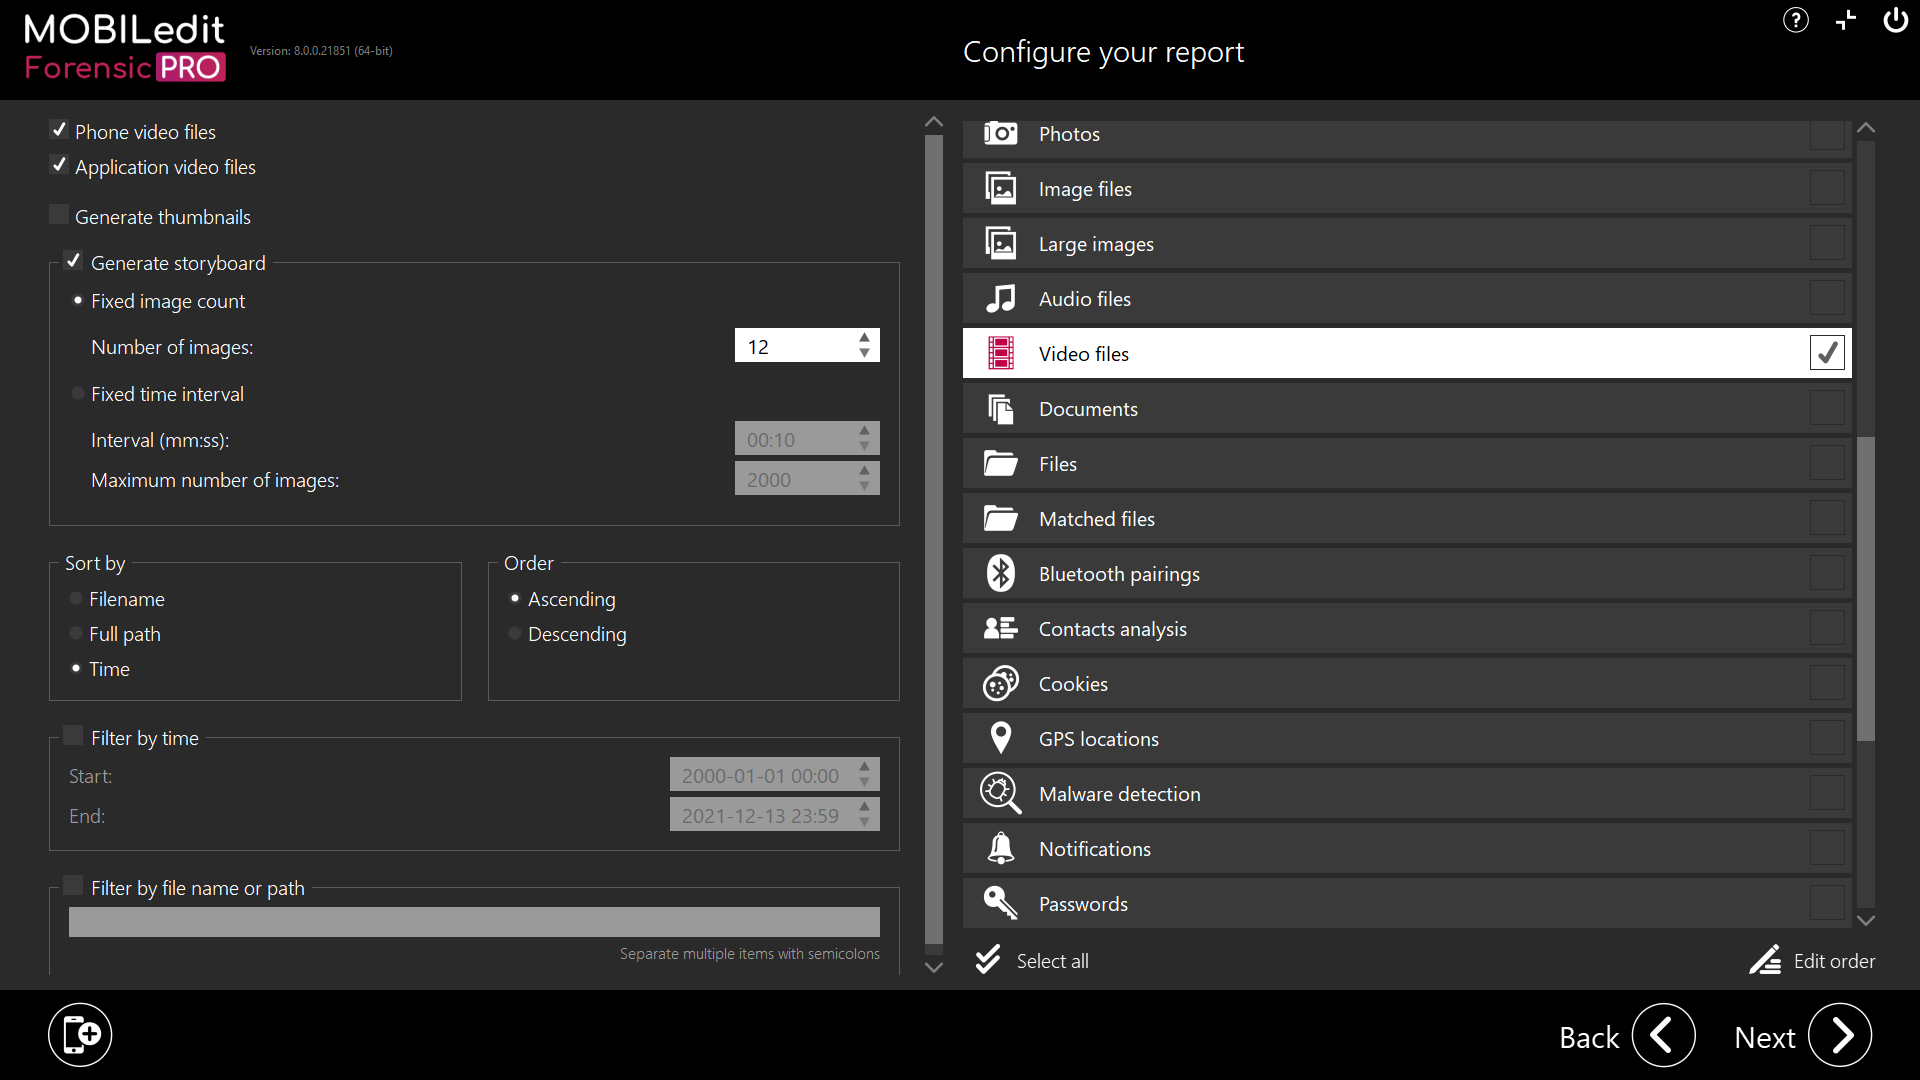
In the above screenshot, there is a "Storyboard settings" inside the red square, which will be displayed after successful installation.
The storyboard is activated by selecting the "Generate storyboard" option.
The first image of the storyboard is generated at the start of the video file.
The default setting generates 12 screenshots per video, and the following options are available:
-
Fixed image count
This option creates a fixed number of screenshots based on the "Number of images" setting, except when the video is shorter (in seconds) than the specified number of images. In this case, one screenshot is created for each second of the video. -
Fixed time interval
This option creates one screenshot per interval of the selected duration (for example, 1 screenshot every 5 seconds of video), which is done using the "Interval" option. The minimal duration is one second. The "Maximum number of images" limits the maximum number of images that can be created.
Uninstallation
Delete the folder where “ffmpeg.exe” is located.
If the “Controlled Folder Access” setting is enabled within Windows security, you will need to allow “ffmpeg.exe”