ODIN method - Flashing TWRP on Samsung devices
This page is a legacy page as the ability to flash a custom recovery to a device in ODIN mode was implemented into MOBILedit Forensic. Third-party tools no longer need to be used.
Please see the page “Odin mode”
Requirements
Your Samsung device
All the correct drivers for your phone installed
Computer with Windows 8 or newer
Odin 3.09 or newer
ADB installed on your PC
The TWRP image file for your device in TAR archive (download from here)
If you're a Linux user, please use Heimdall instead of Odin.
How to
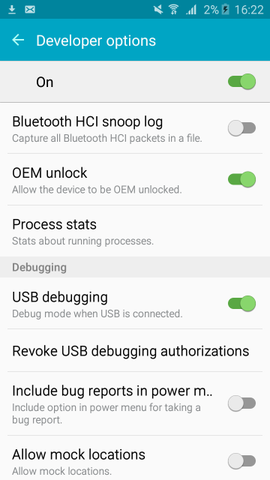
Make sure that you have enabled “OEM unlock” (if available) as seen on the screenshot below.

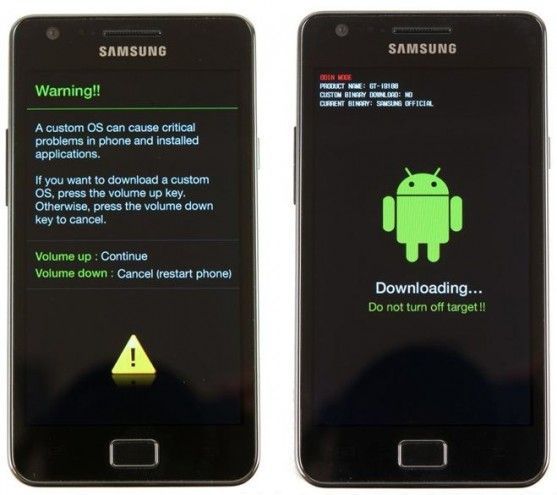
2. Start Odin and restart your phone into "Download mode" by turning it off and holding the 'volume down', 'home' and 'power' buttons for a few seconds.

3. Connect your phone to the PC via USB, Odin should recognize a new device:
4. Make sure that the "Re-Partition" option in Odin is disabled.
5. Click on the "AP" button in Odin and choose your TWRP image (should end with ".img.tar").
6. Click on the "AP" button in Odin and choose your TWRP image (should end with ".img.tar").
7. Once the text "PASS!" appears in Odin, your device should automatically reboot. You can then boot into your new recovery straight from Android using "adb reboot recovery" command.
You can also try to use our in-built flashing tool for TWRP, more information is available here.
Flashing custom recoveries may void your warranty and trip the Knox Warranty void flag!
