Skip table of contents

Camera and screen capture

Use "Camera and Screen Capture" to take screenshots from your device or import images to be projected into a message. This can be useful for retrieving data/chats from apps.

Connect your phone to MOBILedit Forensic and click Next. Select Camera and Screen Capture from the list. Choose the required option from:
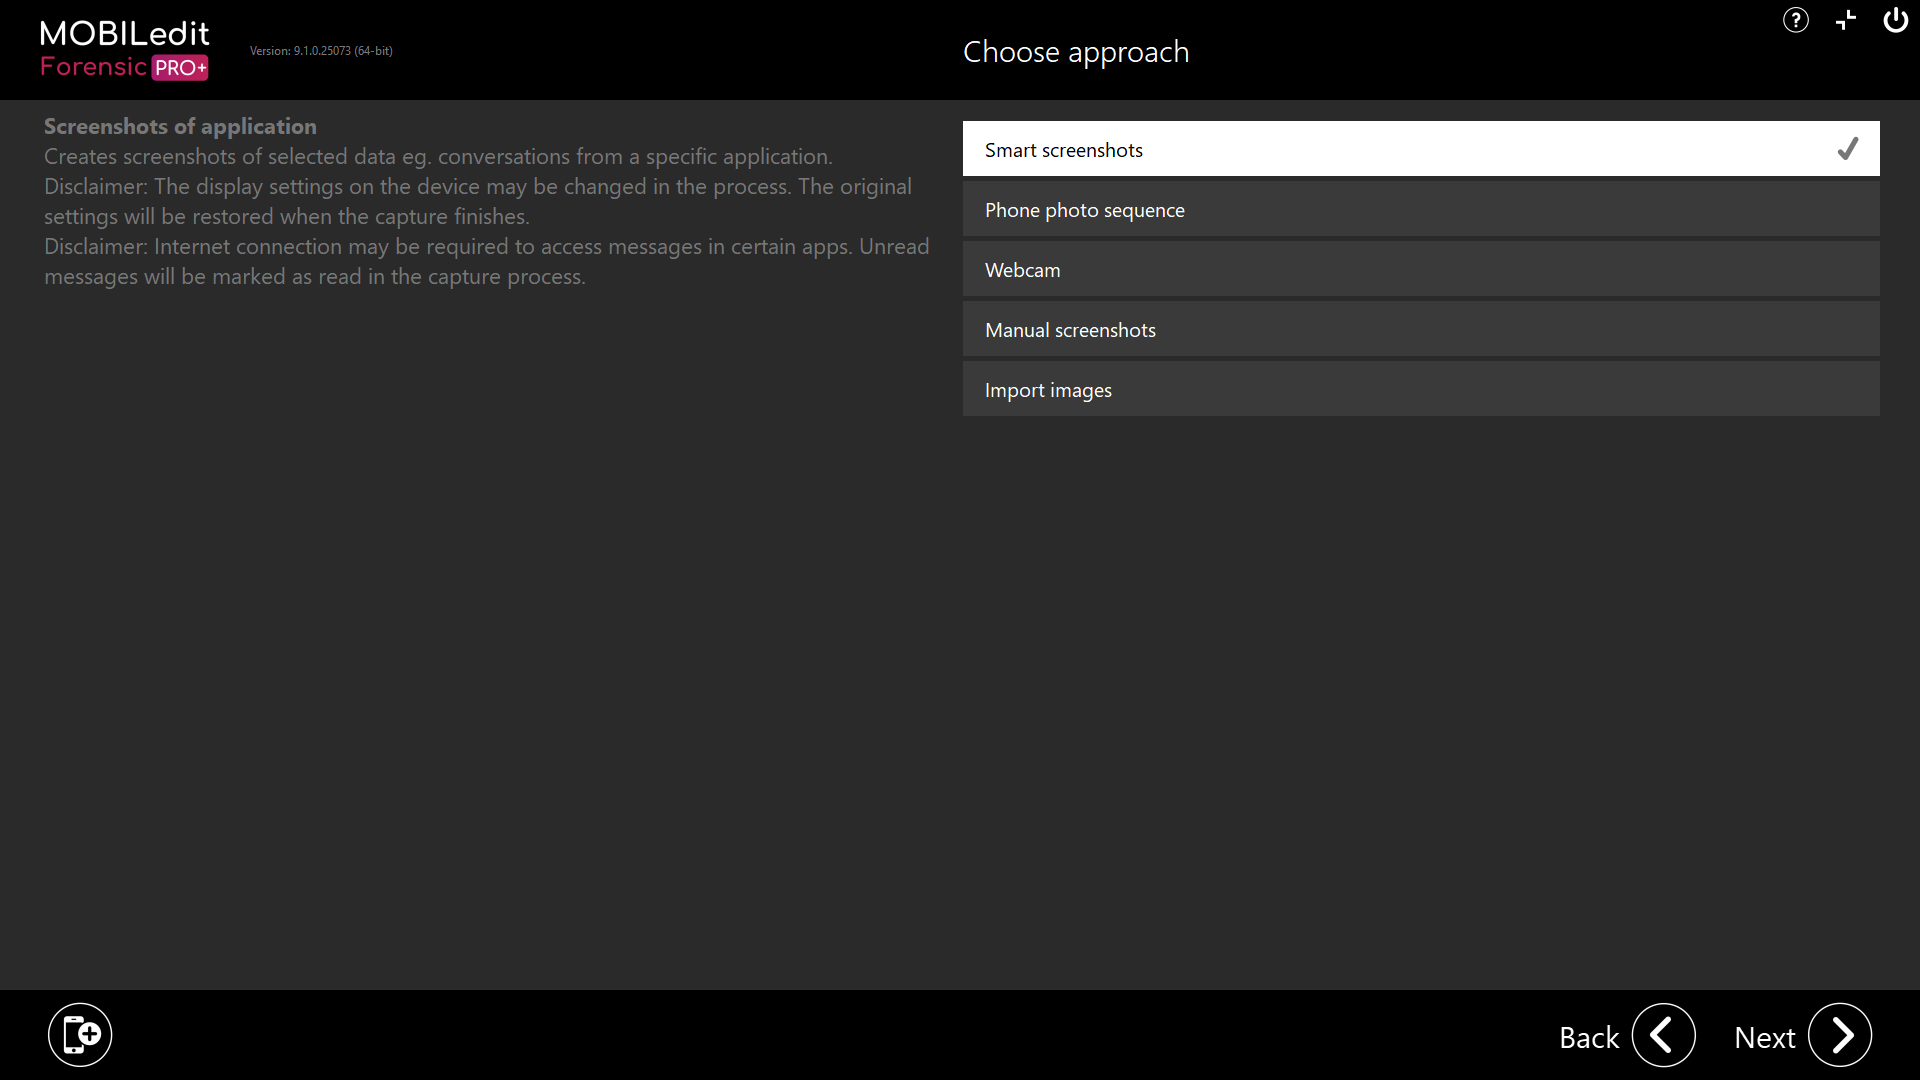
  1. Smart screenshots (Android only)

  2. Phone photo sequence (Android only)

  3. Webcam (Workstation)

  4. Manual screenshots (iOS & Android)

  5. Import images (Workstation)


Smart screenshots

The "Smart Screenshots" feature provides a solution for obtaining evidence from applications that cannot be accessed through logical extraction. This advanced feature enables the extraction of conversations and other information from popular apps where application security restrictions may not allow for extraction via a logical extraction or, root access cannot be gained. The screenshotting is automatic, without requiring any user interaction on the device.

Currently supported applications are:

  • Instagram

  • Signal

  • Skype

  • Slack

  • Telegram

  • Viber

  • WhatsApp

Before starting the process, please set up the device correctly and also make any necessary changes to the required applications settings according to the conditions below:

  • Disable automatic video playback in conversations

  • Disable screen auto-rotate on the device

  • Set the phone system language to English

  • Turn off phone/app notifications

  • The Forensic Connector app has to be installed

Do not touch the device during the process!!!

  • The extraction will run either until the end of the conversation if no filter has been selected or until the "Cancel" button is selected. The "Camera and Screen Capture" page will then appear with all screen captures in one place. From there you can manage individual sequences.

  • In case of any issues, restart the device and the Smart screenshots process again from the beginning.

  • Phone brands with MIUI OS (Xiaomi, Poco etc..) are not supported.

  • iOS is not supported for this method.

Workflow

  1. Prepare the device as mentioned above.

  2. Connect your mobile device to MOBILedit Forensic and click "Next".

  3. From the list of options, select "Camera and Screen Capture" click "Next" and choose the "Smart Screenshots" option.

  4. MOBILedit Forensic will automatically detect and display the supported and installed apps on the phone.

  5. On the left side of the screen, you can filter the data by time and decide if you want to include attachments.

  6. On the right side, you will find a list of supported applications.

  7. Select the desired app and select "Next". MOBILedit Forensic will automatically open the chosen app on the phone and display the conversation list.

  8. Select one or more conversations and click "Capture". MOBILedit Forensic will open the selected conversation and start capturing the screen, beginning with the account information and then moving on to capturing the conversation.

  9. Once the process is complete, press "Next". The captured images will be displayed.

  10. On the bottom right side of the screen, you can add more Smart screenshots from additional applications by clicking the "Add" button or continue to create a report from the captured images by clicking "Next".

  11. You can specify report details on the next screen and choose the output formats.

  12. Select any report option to generate a report containing only photos captured from the device.

  13. If you want to include these photos in a more extensive report, you can create a "Captured Phone Photos Package". This package will contain all of the images captured from the device and can easily be added to your report in "Logical Extraction" > "Specific Selection" > “Captured phone photos”.


Phone photo sequence

For automatic scrolling select the direction scroll and click on “Start”.

Select "Scroll Up" to capture bottom-up content.

Select "Scroll Down" to capture content from top to bottom.

MOBILedit Forensic will scroll and take screenshots until it reaches the end of the content, or until you press the Cancel button during capture progress.

Each captured screenshot can be marked with an image type and a note. The number of screenshots taken is unlimited.

For Xiaomi devices with MIUI, you need to enable "USB Debugging (Security Settings)" in "Developer Options".
More information can be found here.

iOS devices are not supported for this feature.

Workflow

  1. Connect your phone to MOBILedit Forensic and click “Next”. Select “Camera and screen capture” from the list. Choose the “Phone Photo Sequence” option.

  2. On the phone, open the application you want to capture, select the scroll direction as “Up” (to capture bottom-up content) or “Down” (to capture content from top to bottom), and click on “Next”.

  3. Specify the report details by filling in the information, clicking “Next” and selecting one or more output formats. You can then proceed to start the export.

  4. If you want to include these photos in a more extensive report, you can create a "Captured Phone Photos Package". This package will contain all of the images captured from the device and can easily be added to your report in "Logical Extraction" > "Specific Selection" > “Captured phone photos”.


Webcam

Taking pictures of for example physical evidence with a camera connected to the computer.

Each picture can be managed.

Workflow

  1. Connect your phone to MOBILedit Forensic and click “Next”. Select “Camera and screen capture” from the list. Choose the “Webcam” option.

  2. Click on the “Add” button

  3. Click on “Capture” and click on “Next”.

  4. Specify the report details by filling in the information, clicking “Next” and selecting one or more output formats. You can then proceed to start the export.

  5. If you want to include these photos in a more extensive report, you can create a "Captured Phone Photos Package". This package will contain all of the images captured from the device and can easily be added to your report in "Logical Extraction" > "Specific Selection" > “Captured phone photos”.

Or there is a second way:

  1. Select “Add other evidence” on the connection screen. Select “Webcam” and click on “Next”

  2. Click on the “Add” button

  3. Click on “Capture” and click on “Next”.

  4. Specify the report details by filling in the information, clicking “Next” and selecting one or more output formats. You can then proceed to start the export.

  5. If you want to include these photos in a more extensive report, you can create a "Captured Phone Photos Package". This package will contain all of the images captured from the device and can easily be added to your report in "Logical Extraction" > "Specific Selection" > “Captured phone photos”.


Manual screenshots

Take a screenshot of anything displayed on your device.

To capture a screenshot on iOS 16 and above enable 'Developer Mode'. However, starting from iOS 17, screenshots are no longer supported due to restrictions in the iOS. For more information on 'Developer Mode', click here.

Android & iOS are supported for this method. To use it with iOS you must have the “iOS screenshot support” package installed.

Workflow

  1. Connect your phone to MOBILedit Forensic and click “Next”. Select “Camera and screen capture” from the list. Choose the “Manual screenshots” option.

  2. Click on the “Add” button, and MOBILedit Forensic will create a screenshot. You can select “Type” and name it. If you want to create another one, change the screen on the phone and click on the “Add” button and click on “Next”.

  3. Specify the report details by filling in the information, clicking “Next” and selecting one or more output formats. You can then proceed to start the export.

  4. If you want to include these photos in a more extensive report, you can create a "Captured Phone Photos Package". This package will contain all of the images captured from the device and can easily be added to your report in "Logical Extraction" > "Specific Selection" > “Captured phone photos”.


Import images

This way images can be imported to the MOBILedit Forensic and displayed in a report.

Workflow

  1. Connect your phone to MOBILedit Forensic and click “Next”. Select “Camera and screen capture” from the list. Choose the “Import images” option.

  2. Click on the “Add” button, select the images you want to add, and click on “Next”.

  3. Specify the report details by filling in the information, clicking “Next” and selecting one or more output formats. You can then proceed to start the export.

  4. If you want to include these photos in a more extensive report, you can create a "Captured Phone Photos Package". This package will contain all of the images captured from the device and can easily be added to your report in "Logical Extraction" > "Specific Selection" > “Captured phone photos”.

Or there is a second way:

  1. Select “Add other evidence” on the connection screen. Select “Import images” and click on “Next”

  2. Click on the “Add” button, select the images you want to add, and click on “Next”.

  3. Specify the report details by filling in the information, clicking “Next” and selecting one or more output formats. You can then proceed to start the export.

  4. If you want to include these photos in a more extensive report, you can create a "Captured Phone Photos Package". This package will contain all of the images captured from the device and can easily be added to your report in "Logical Extraction" > "Specific Selection" > “Captured phone photos”.


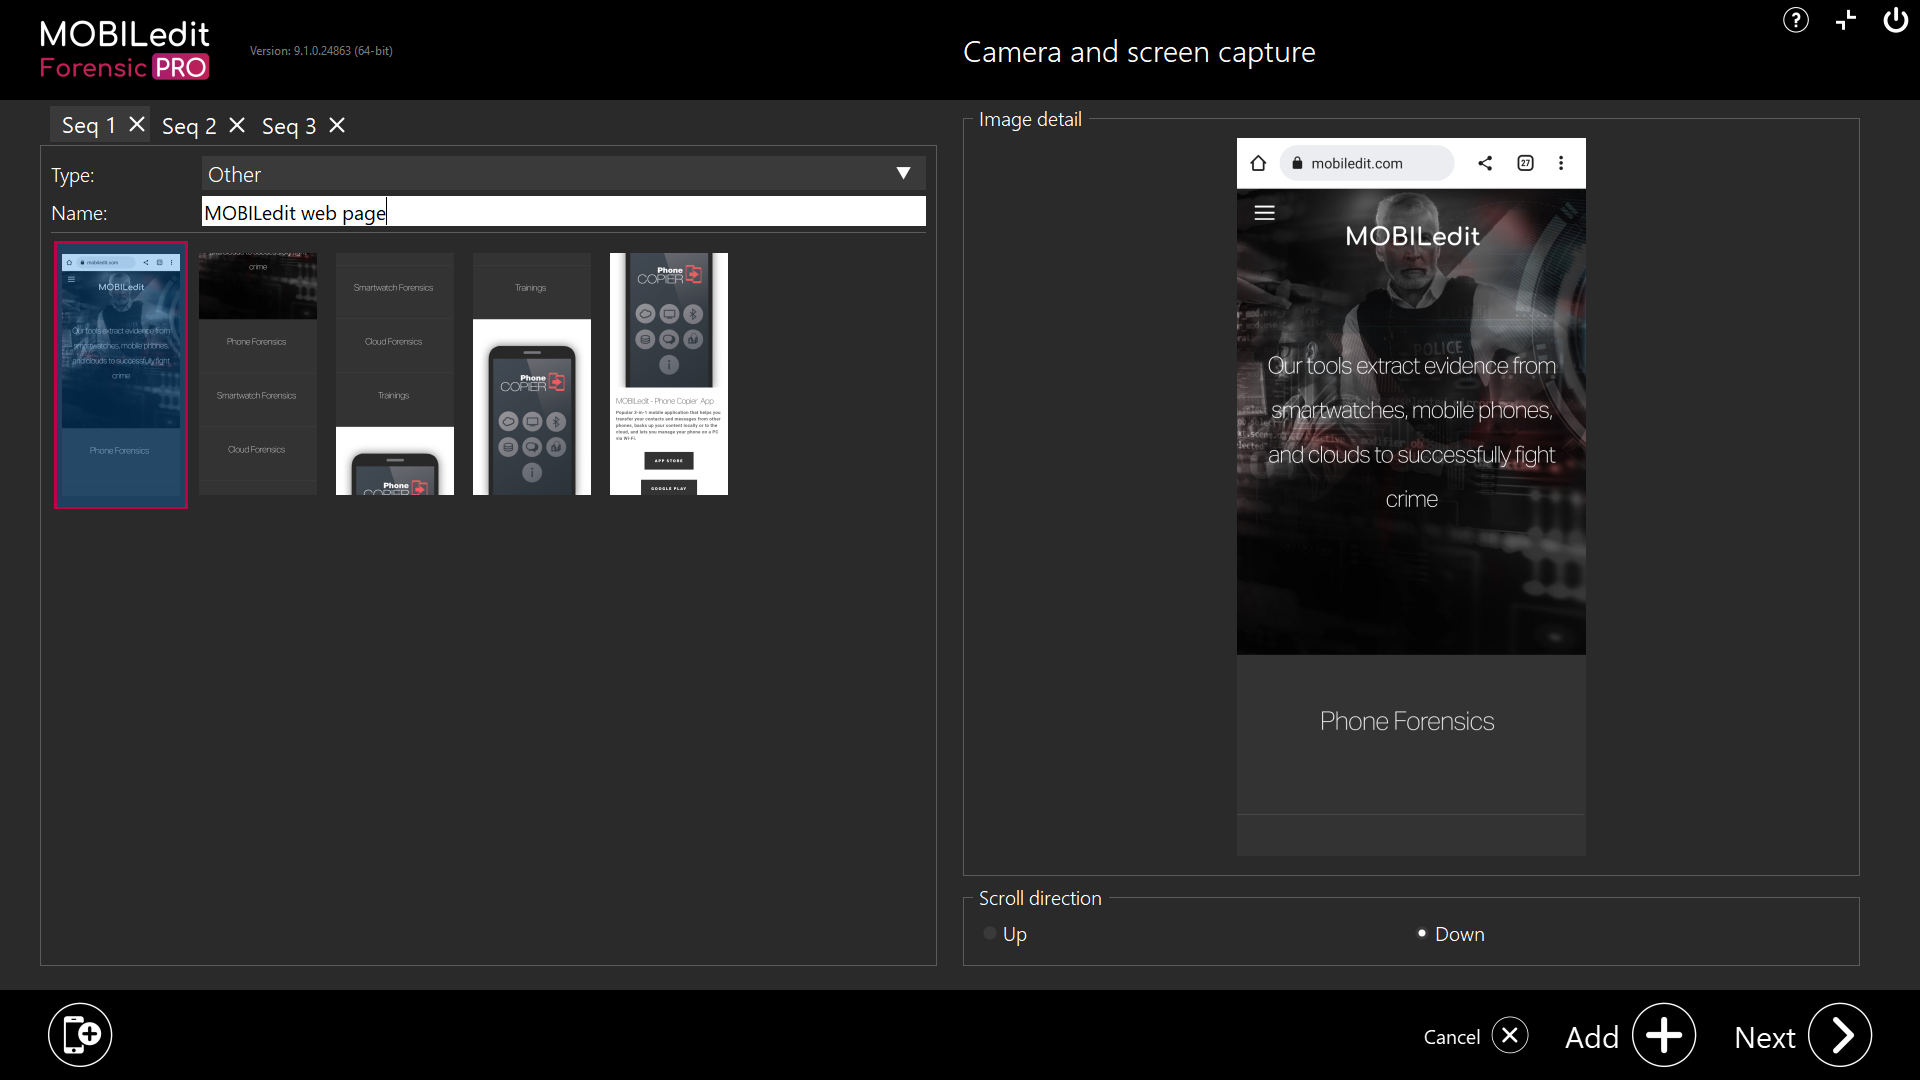
Camera and screen capture - managing pictures

Managing taken pictures is possible for all of the parts of “Camera and screen photo”.
Each picture can be named a selected Type (Phone photo, Contacts, Emails, etc.…).

  • in some options, such as "Manual screenshots", images can be removed. This is not possible in the "Smart Screenshots" option.…

JavaScript errors detected

Please note, these errors can depend on your browser setup.

If this problem persists, please contact our support.