

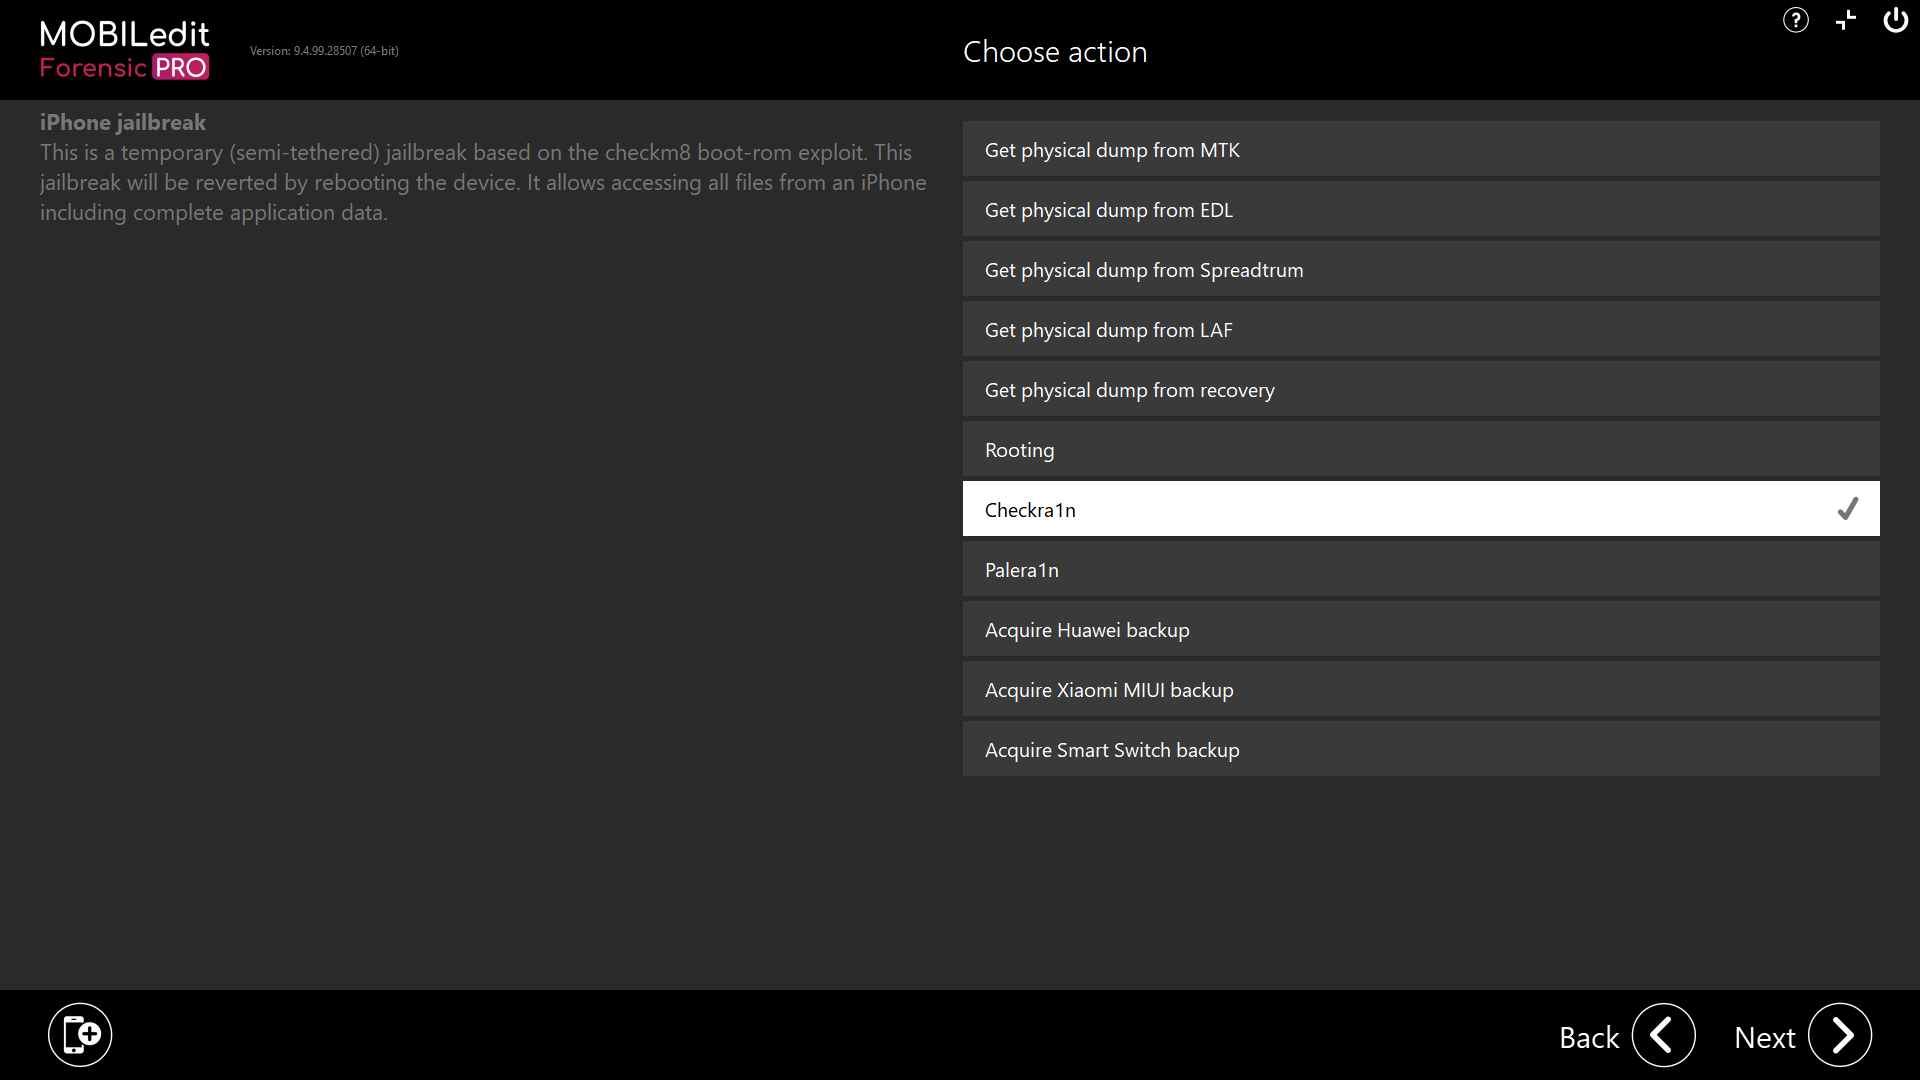
MOBILedit Forensic - Security bypassing > By method > checkra1n
MOBILedit Forensic does not automatically jailbreak devices using checkra1n, we offer and include full instructions within the user interface by selecting Security bypassing > By method > checkra1n.
There are step-by-step instructions and screenshots to show how it looks when running checkra1n using the live Linux distribution.

How to use checkra1n
Prerequisites:
-
Bootable USB Flash Disk with checkra1n Jailbreaking Capability: Available in the MOBILedit Forensic Connection Kit. Alternatively, you can create your own bootable Linux USB flash disk with checkra1n.
-
Apple Device Compatibility: Devices with A7 to A11 Bionic chipsets running iOS 12.0 to iOS/iPadOS 14.8.1.
-
USB Cable: Compatible USB cable to connect the Apple device to your computer.
-
Computer Requirements: A computer with an Intel processor, capable of Legacy booting from a USB flash disk.
How to Use the Bootable USB Flash Disk with checkra1n Jailbreaking Capability:
-
Prepare Computer BIOS:
Ensure your computer's BIOS is set to boot from USB (Legacy external device boot: USB storage device, Secure Boot disabled).
-
Insert USB Flash Disk:
Insert the USB flash disk into a USB port of your switched-off computer.
-
Boot from USB Flash Disk:
Restart your computer and boot from the USB flash disk (select: Legacy external device boot: USB storage device).
-
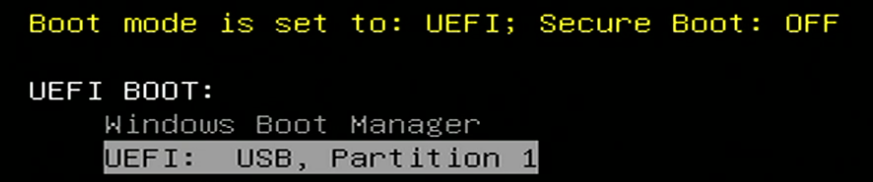
Note: For example, on Dell computers, you can access the one-time boot menu via F12 when starting the system. Then from the UEFI BOOT: menu select the UEFI: USB, Partition 1
-
-
Bootra1n Screen:
On the Bootra1n screen, select "Void Linux (USB Safe)" and press Enter.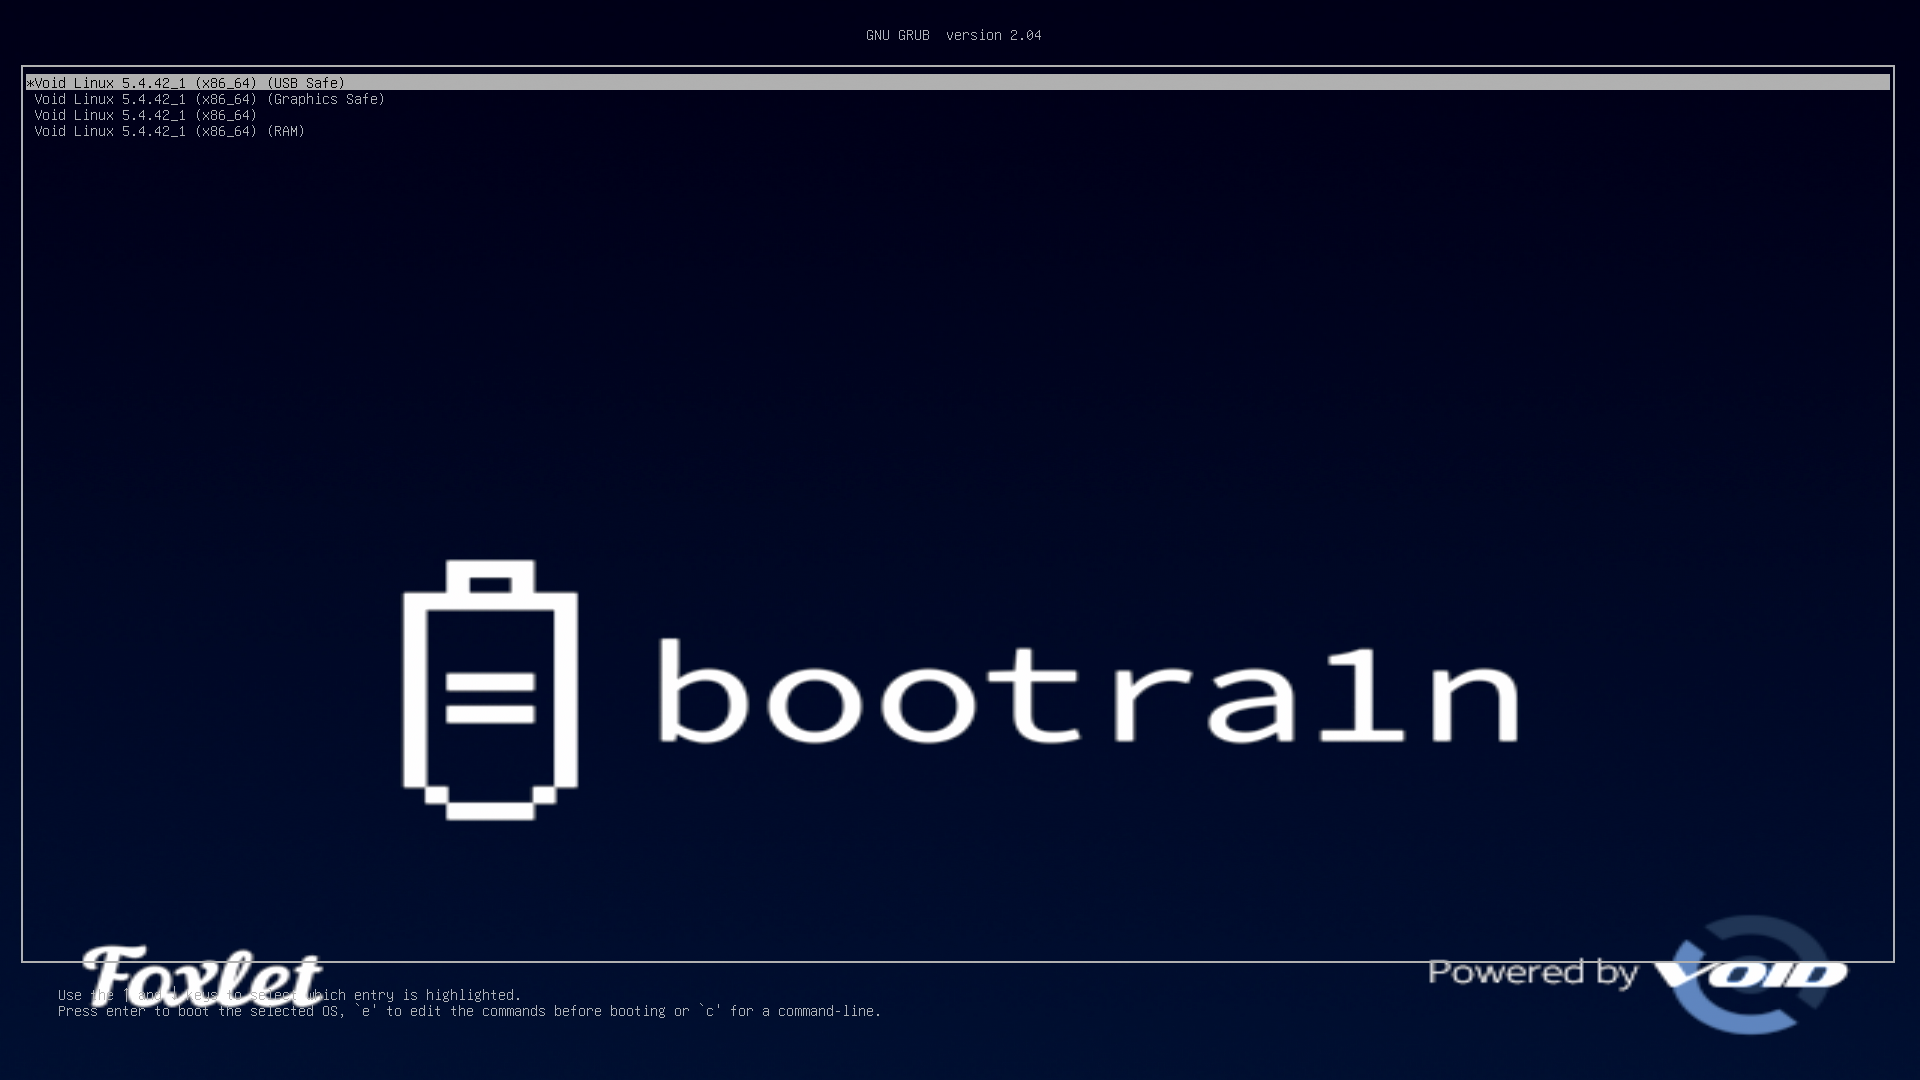
-
Login Details:
void-live login: root
Password: voidlinux

-
Run checkra1n:
Execute the command: checkra1n
The checkra1n user interface appears on the computer screen.
-
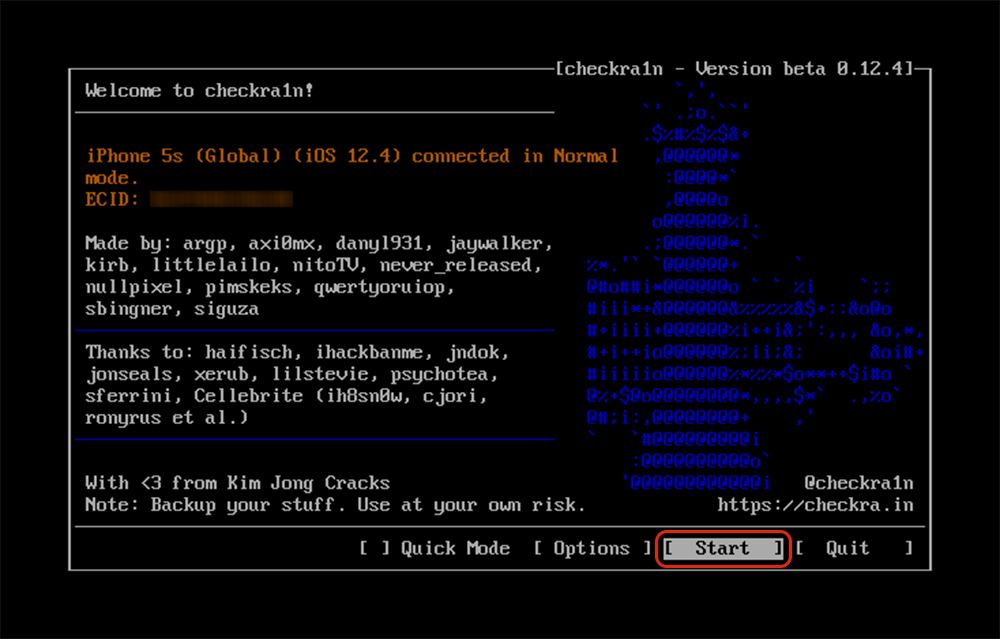
Connect Apple Device:
Connect the Apple device in normal mode via USB. Confirm trust on the Apple device screen.
If the device is connected correctly, the checkra1n user interface will provide information about the device model, ECID, iOS version, and mode in which the device is connected.
To continue the jailbreak process, select [Start]:
-
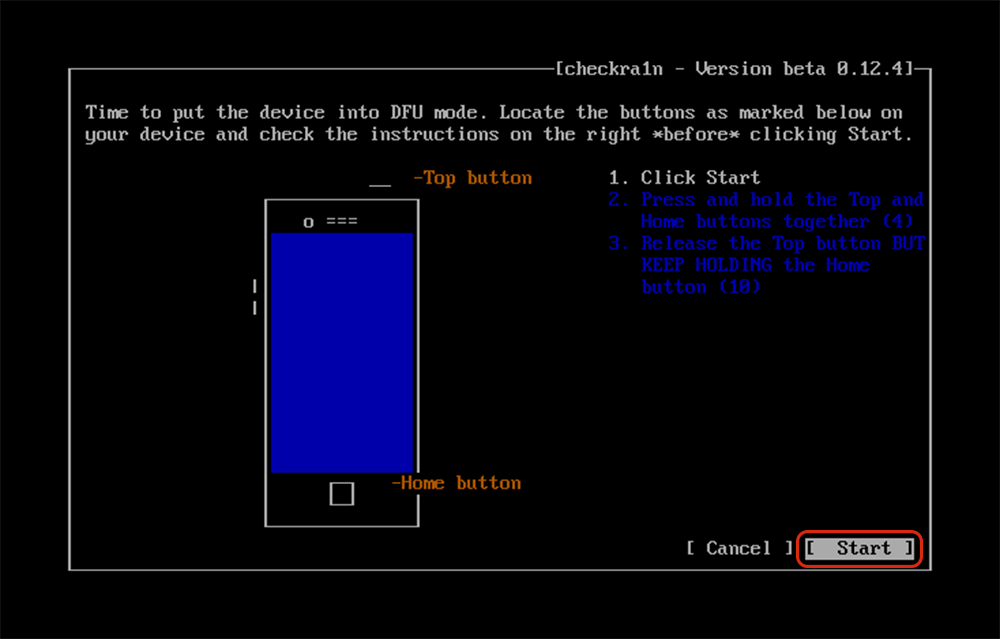
Enter DFU Mode:
When you are ready for DFU mode, select [Start] again and follow the on-screen instructions for pressing and releasing specific buttons on your Apple device (varies by device model):
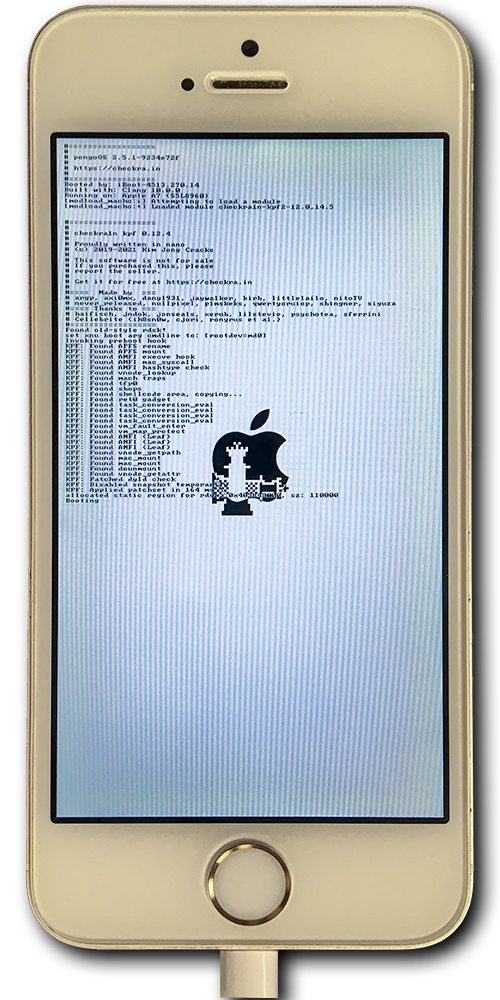
checkra1n will then restart the device into DFU mode, execute the exploit, boot the kernel, and start the jailbroken iOS.
-
Completion:
Your device is now jailbroken.
For a jailbroken device to successfully connect to MOBILedit Forensic, Apple Mobile Device Service must be enabled on the workstation.
This can be achieved by having iTunes installed on the workstation. To obtain the correct installation package, use this direct link "Download iTunes for Windows now (64-bit) - apple.com" and do not use the iTunes provided through the Microsoft Store.
How to check if a specific device is jailbroken using checkra1n:
-
the checkra1n icon is visible on the device screen
and
-
When the device is connected and recognised by MOBILedit Forensic, The text "JAILBROKEN" is visible under the photo of the connected device and the "Rooting status" in "Phone Info" is "SSH" or “AFC2, SSH”.
How to remove the checkra1n jailbreak from the device
The checkra1n jailbreak is semi-tethered and runs only in the RAM of the device. Once you have completed all the analysis and want to remove the jailbreak from the device, just restart or shut down the device. When you restart or shut down the operating system, the device will no longer be jailbroken.
Please ensure that these instructions are used in compliance with legal and ethical standards, especially considering their application in digital forensics and law enforcement contexts.